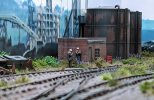
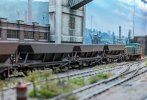
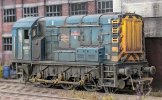
4mm BSC Orgreave Coking Plant

jonte

Western Thunderer
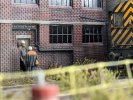
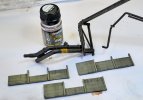
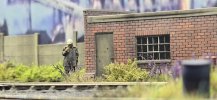
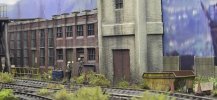
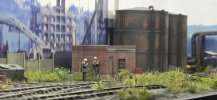
Got the excavator finished up, as well as the Modelu figures painted and planted. This basically finishes the layout :)

The only things left really are to fix the fascia in place, and then come up with some ides for fiddle yards and legs ready for the Sheffield exhibition.

View attachment 177670


View attachment 177671

View attachment 177672

View attachment 177673

View attachment 177674

Nice job on the heavy plant.

Did you use a sponge to apply the paint that represents exposed metal/rust around the edges of the beams/cab etc, and then develop them with a fine brush, or was it applied just with the brush?

jonte
 

jonte

Western Thunderer
I think the excavator is just brilliant. A standard to aim for. Bravo!

This video gives an idea of the technique I was querying with the poster in my earlier post:


If you want to skip the introduction, it starts from around 4 minutes 40 seconds in, but it makes for quite an entertaining as well as informative watch.

I’ll post it up elsewhere on the forum for those unfamiliar with the technique, which while a well known tool for military modellers, would also have uses for railway modellers in developing scenic areas.

jonte
 

SimonT

Western Thunderer
It is worth looking for pdf back numbers of The Weathering Magazine on the internet. These techniques have been available there for years. I found that open cell make-up sponges work better than packing foam. The circular ones are really useful as they can be folded to give a point or edge. Don't use the cotton wool ones!
I'm one for the 'magnificant' vote for the excavator. Hope I see it in the flesh one day.
Simon
 

Locksley

Member
Thanks very much for the kind comments chaps, all rather humbling!

Nice job on the heavy plant.

Did you use a sponge to apply the paint that represents exposed metal/rust around the edges of the beams/cab etc, and then develop them with a fine brush, or was it applied just with the brush?

jonte
Indeed! In fact it was purely sponge chipping, never quite got the hang of brush chipping. Night Shift is my number 1 reference/inspiration for all of my recent armour, and in fact railway modelling. He's just so unbelievably good at what he does, and produces really excellent tutorials that are easy to follow, even if he does make it all look completely effortless :D

I'm one for the 'magnificant' vote for the excavator. Hope I see it in the flesh one day.
Simon
Thank you very much! The plan is for the layout to be at the Sheffield Model Railway Enthusiasts exhibition at Birkdale School, S10 3DH on 1st & 2nd April, and hopefully at Thirsk Town Hall on 30th July.
 

Locksley

Member
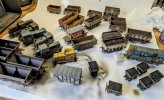
Time for some prep for the exhibition at Thirsk on 30th. Pulled out the entire fleet for some TLC. Think it might be the first time it's all been on the bench together. The newest additions being the 5 resprayed Bachmann CEAs to HEAs which should look good being shunted about.

PXL_20230725_081045988~2.jpg

Nothing too major has been done layout-wise since my last post, apart from it literally falling front-first off the trestles nearly 2 metres onto a hard floor at the end of the Sheffield exhibition :D luckily, and rather incredibly, it sustained very minimal damage - the tippler tower detached but remained in one piece, the only actual casualties were the skip (somehow lol), the weighbridge hut, and the facia board which split on one side.

I actually already had a spare painted up skip so that was easily replaced. The weighbridge hut was unsalvageable but tbh I quite like the look of the layout without it so I've simply left it off. The area has been covered with weeds and bushes, giving the right hand side of the layout a much more open feel which I really like. It's also removed the most significant clearance limitation so I can finally run the 08 on the whole layout! The fascia board was replaced with a bit better quality one, which gave me the opportunity to slightly increase the height of the opening.

The final major change is the addition of a longer fiddle board at the left hand end - this should allow slightly longer trains to be moved about. The original fiddle boards I came up with used the shorter boards that SMC offer with some 3d printed/angle aluminium cassettes. I found at the Sheffield MRX that I barely used the cassette system at all, so I've decided not to bother replicating that on the new fiddle board, which is both nice and also very annoying as they took bloody ages to make. I'll keep the existing smaller fiddle board on the right hand end for now as this ended up being used essentially as a glorified headshunt. At some point I may get another larger one for that end but for now it's fine.

PXL_20230725_081637726~2.jpg
 
Last edited:

steve50

Western Thunderer
I've just come across your thread on here Alex, got to say the layout and your work are just superb!
I'm prepping some stock and layout for my first ever exhibition and I'd love to know more about your weathering techniques, I love the 08 and the Janus.

Steve.
 

King Crab

Western Thunderer
Well, I figured I ought to make a first post here. I've been fairly active posting various micro-layout threads over on RMWeb for the past few years but the image issue has sort of made me jump ship.

Back in September my partner and I moved to a new house on the Waverley estate on the Rotherham/Sheffield border, slap bang in the middle of what was Orgreave Coking Plant (in fact I've sort of managed to narrow down a fairly exact location to find our house is pretty much right in front of one of the coke oven banks) so naturally a layout had to be built!

I have a real thing for micro-layouts so this is being built on one of the Scale Model Scenery baseboard in a box sets which gives me ample room for what I need. Although heavily based on Orgreave, it's not an exact replica, rather I've taken a few aspects of the real site from photos and arranged them around a simple track plan.

View attachment 175475

View attachment 175476

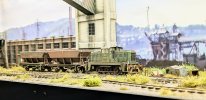
The track plan should give me at least some operating interest, certainly compared to just a simple inglenook like I've built previously - my aim is to get this ready for the Sheffield Model Railway Enthusiasts exhibition on 1-2 April 2023 so I wanted something that'll be at least sort of fun to operate. I've also designed in a working end-tippler. The rake of Dapol 16 tonners loosely represent the internal fleet present in the 1980s, and are modified with a 3D printed opening end door.

View attachment 175477

View attachment 175478

View attachment 175479

View attachment 175480

View attachment 175481

I wanted to make a point of using purely Peco Bullhead track as I've been itching to use some for yonks - and it really is lightyears ahead of standard Code 75. The layout is wired up purely for DCC operation and servo controlled pointwork/tippler. The tippler itself is 3D printed in both FDM and resin, as is the weighbridge plate.

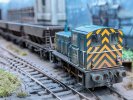
Stock will be a little more varied, although I will be using a Sentinel and Janus as per the real place, I plan to also run a few other locos I can just about get away with such as the AB and probably an 03/08. Nearby Orgreave Colliery also had a Kerr Stuart Victory so I've added the new Pi one to my list, they also had an ex-BR green 04 and a Hunslet Austerity which will most likely appear at some point too. It's entirely possible/likely that these may have made their way over to the Coking plant as both sites were directly rail linked.

Hi.
Can you give us a bit more detail on the tippler.
That looks brilliant!

Peter
 

Locksley

Member
I've just come across your thread on here Alex, got to say the layout and your work are just superb!
I'm prepping some stock and layout for my first ever exhibition and I'd love to know more about your weathering techniques, I love the 08 and the Janus.

Steve.

Thanks Steve! I tend to follow a more plastic model style of weathering, usually starting with a dark wash which is mostly wiped off, then chipping/rust added using a sponge in a dabbing action with some very dark brown paint. After that I usually do some rusty streaks using AK or Mig Ammo enamel washes, followed by a light misting of a couple of different thinned browns from the airbrush around the running gear. Final step is always a good coat of a decent matt varnish.

Hi.
Can you give us a bit more detail on the tippler.
That looks brilliant!

Peter

Thanks Peter, apologies for the late reply! Check post #10 4mm - BSC Orgreave Coking Plant, the mechanism is about as simple as it gets!
 

Locksley

Member
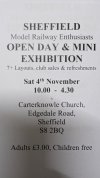
Starting to get the layout spruced up for its next outing - which should, all being well (see further down this post!) be the Sheffield Model Railway Enthusiasts club open day on Nov 4th. If anyone is in the area and interested in attending, details are as below:

PXL_20231010_204158798.jpg

The layout actually didn't need much more than a dust off since its last trip out to Thirsk in July. The one thing I did want to do was to upgrade the lighting rig. Previously it used a fairly sparse RGB LED strip which gave quite a cold light, and wasn't particularly bright. I decided to pick up another LED strip, this time much more densely populated with diodes, and much warmer in temperature. The difference was night and day, pun absolutely intended. I also popped some cheap mirror stickers across the inside of the fascia board to hopefully reflect some light back towards the layout as well. I don't know how effective this actually is, but it's there.

PXL_20231025_103249292~2.jpg

Unfortunately, through my own fault entirely, I believe I've burnt out my DCC power supply... I hooked these new LEDs up to the 12v accessory power I use to power my point servo controller board. This is something I've successfully done on a previous layout, but unfortunately I think these must have drawn just a bit too much power as they switched off after around 30 mins and my Arduino DCC kit is unresponsive. The power brick was very warm which is leading me to think it's likely that that's gone kaput, typically my multimeter has also broken so I can't actually test it.

Anyway, a new multimeter is on the way from Amazon so I can test the power supply before I buy another, just to make sure. Fingers crossed it's only that, and that nothing else has gone pop, otherwise it likely won't make the club open day.

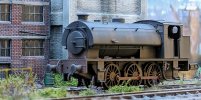
In the meantime, I treated myself to an EFE J94 after TMC had an extra 10% off the already excellent 50% off sale price. It's a lovely model, with much improved performance since the DJM release. I set about it with reckless abandon, stripping the gaudy NCB blue and yellow livery, before spraying into black to represent Nr.12, the resident Orgreave Austerity. It's a little anachronistic having been scrapped in the 60s, but I like it enough to allow a little artistic license! This will get a crew, couplings, and Narrow Planet works plates in due course.

PXL_20230917_130057497~2.jpg

It was also my birthday yesterday so I decided to part with a bit more dosh and grab myself one of the 6 wheel Hornby Sentinels, again at a very attractive price from TMC. I don't think Orgreave ever actually had a 6 wheel Sentinel, but I had the pleasure of respraying a mate's example a few months ago and instantly fell in love with the model. Much better designed than the 4 wheel variant, the main selling point for me being the drop-out chassis, no longer an integral part of the model. The chassis is very similar, if not identical, to ones used on some 6 wheeled Thomas Hill locomotives so it's an excellent candidate for another 3D printed bodyshell at some point in the future.
 

Locksley

Member

Locksley

Member
Disaster (narrowly) averted. I realised after testing the power supply that it wasn't actually broken. All that had happened was the power draw had been so great that it'd slightly melted one of the (rubbish) choc blocks I'd used inside the DCC controller box, enough that one of the power leads had moved and lost contact with the metal inside. Of course I'd already ordered a new power supply by this point but hey ho, a spare probably isn't the worst idea to have in the exhibition box!

So, much better choc block installed, power supply wires restripped, soldered and reconnected, we have a working DCC system again. I've disconnected a couple of strips of the new LEDs to reduce the draw, and hooked them up to a proper, dedicated, much higher rated LED power supply.

PXL_20231026_185247208~2.jpg
 

Locksley

Member
Well, after about 30 mins use, the LEDs cut out again. I'm now suspecting it's just the dodgy cheapo LED strips - they shouldn't be drawing more than about 50w but have now burnt out the new 12v, 5a, 60w power supply. So, LEDs in the bin, power supply back off to Amazon.

I've now put on some different LEDs I already had in the cupboard which should still be fairly bright but only draw 24w. I've also ordered a new completely overkill 12v, 10a, 120w power supply so fingers crossed it should now work.
 

Locksley

Member
Crikey, it's been almost 6 months to the day since my last post on here. I'm pleased to report that the new LEDs have been absolutely fine since :cool:

I'm starting to get the layout ready for its next exhibition, Neepsend MRX on 18th - 19th May at Grenoside Community Centre in Sheffield. Nothing too major needs to be done, the main thing being the addition of another larger fiddle yard at the right hand end. This should make it possible to drive slightly longer trains through the scene and generally increase the operational interest. I decided to overhaul the existing left hand end fiddle while I was at it as that one was a little bit rushed to get it ready for the Thirsk exhibition last year so the track was a bit wibbly. Both fiddle yards are now in the paint shop getting a coat of satin black to match the fascia, then I can whack a couple of lengths of Peco set-track straights down.

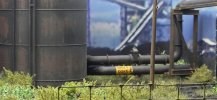
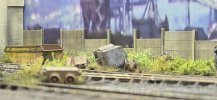
Other than that, I keep thinking of little scenery bits that I could add, the latest being some concrete fencing to break the scene up a bit more, and some pipework which it has definitely been lacking!


20240426_154438~2.jpg

Since its last outing I've also got the EFE J94 running properly and I finally succumbed to a second hand Pi Kerr Stuart Victory for a price too good to refuse. Next job will be getting that chipped and weathered, then I want to fit some Smiths 3-Links on a few bits of stock that are currently using Accurascale ones. As nice as the those are, the Smiths ones are a tad larger and therefore much easier to actually use, especially in an exhibition environment.
 

Locksley

Member
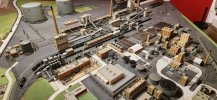
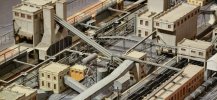
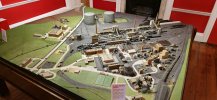
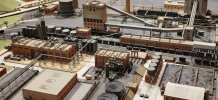
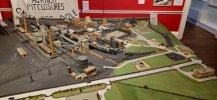
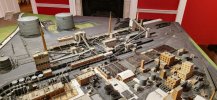
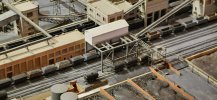
Today, I finally got around to visiting the exhibition currently on at Clifton Park Museum dedicated to the effects of the miners' strike in and around Rotherham, the centrepiece of which is a frankly stunning architectural model of the entire Orgreave site. At roughly 1mm to the foot scale, it's bafflingly detailed and offers a now invaluable 3d view of the Coking Plant.

The model was salvaged from an office at Orgreave around the time of closure, the information stating that the model dates from the 1960s however looking at some of the vehicles, and the fact that there are a few boxvans on the model in GW, NE and LMS livery, I suspect it more likely dates from earlier, unless these were errors introduced during restoration.


20240428_142820.jpg

20240428_143050.jpg

20240428_143154.jpg

20240428_143405.jpg

20240428_143440.jpg

20240428_143753.jpg

20240428_144645.jpg

20240428_144649.jpg

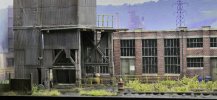
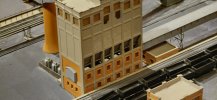
This last photo is the area that my layout is mostly based on, albeit mirrored and shrunk a little, with the brick workshop building and the end tippler. Seeing the model has really given me some inspiration to rework a few areas on the layout which I think could be improved, and a few more things I reckon I could add in. More on this to follow!
 
Top