Nick Dunhill's Workshop - GWR Broad Gauge (ex- Bristol and Exeter) Pearson 4-4-0ST.

paulc

Western Thunderer
This week Jeff has been away on hols, and I didn't want to bother him with constant questions about the build. I had planned to build a resin kit of 10000 (diesel one,) and machine the parts out of doors to prevent my workshop from acquiring a layer of resin dust. However the sunshine in South Yorks has been sometimes of the aqueous type so I took the bold move to add details to the model without Jeff's guidance. What could possibly go wrong.

View attachment 243106

I added the lamp irons to the rear and front of the loco and built the bunker front. I also added the front steps to the loco.

View attachment 243107

View attachment 243108

In the GWR era the locos were fitted with a vacuum brake pipe for the train (the loco only had a handbrake.) The loco had a very conspicuous vac pipe nailed to it, and I made that.

View attachment 243109

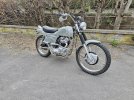
On Wednesday I took my Rickman Metisse to a Govt testing centre for a MSVA Certificate, and it passed so I spent the rest of the day celebrating.

On Thursday I added all the loco controls. This loco is very unusual in that the firebox backplate is in front of the cab front, and all the controls poke through holes in it, thus:

View attachment 243110

Today I took a deep breath and made the cab steps. There were many daunting looking etched parts, but they went together surprisingly easily. It sort of aligns itself when you fit the handrails.

View attachment 243111

View attachment 243112

A very weird loco indeed.

Next week the sun will shine, and I'll be machining resin parts out of doors.
Those steps/ladder are huge . I see you've invested in a new sheet of paper but not newspaper so i can't read what's happening in the UK . :(
 

Nick Dunhill

Western Thunderer
There is a little urgency to finish this week and hit the budget. I finished off all the main bits of metalwork last week which just leaves fitting up all of the rods, levers and pipework.

There is nothing in the kit in the way of castings yet. I seem to be the trail blazer, so I had a word with Mick Davies and got the springs and hangers, horn cheek plates, chimney, water filler, and smokebox door 3D printed. I have had a word with Peter Boyce at the BGSoc (who will be marketing/selling the kit) and Mick will make all of the prints available to anyone who wants them. This still left the injectors and reversing mechanism to be scratchbuilt.

I had planned to fit the boiler/smokebox/saddle assembly to the footplate, but decided it would be easier to drill the footplate without the body attached. I cut lots of flanges off fittings I had in stock and made the injectors for the loco.

54658939616_e7e1564708_b.jpg

I also added the pick up pipes from the rear and saddle water tanks.

54658100027_6c0a6c2b41_b.jpg

Next I soldered the boiler etc to the footplate, but first I took off the rear firebox former. I think that the former became a little distorted with me constantly manipulating the structure, filling it with lead sheet and soldering things to it (heating and cooling cycles.) The firebox bottom fits into a slot in the footplate and was made of two laminations so didn't want to splay open once the former was gone. The firebox fitted very snugly against the cab front now, and I gained the 0.2 mm I needed to make the smokebox land correctly. Happy days.

I made/added the reverser mechanism to the RHS of the firebox and that is as far as I have got.

54658100267_9c3e40141e_b.jpg

Tomorrow and friday I will make my way across the top of the firebox and saddle, adding stuff, and then complete the smokebox.

54659165918_10b5c90114_b.jpg

54658100362_9537ac4c2e_b.jpg
 

Nick Dunhill

Western Thunderer
I have added more details round the firebox top. I made a steam fountain and added the pipes that run to the injectors and also the whistles.

54664840963_d379af5665_b.jpg

I also fitted a safety valve cover and plinth that were supplied by the BGSoc (I think.) I had some left-over parts for the safety valve springs, operating lever and Salter balance in my bits box.

The next job, last for this week, were the wacky handrails along the firebox/saddle/smokebox. Firstly though a tip-of-the-hat to Jeff, who designed the kit, for getting the pre-etched holes for the knobs in exactly the right place in the etched panels. The handrail knob on the firebox is a standard medium knob from Markits. Jeff provides some etched rectangular fixing plates but you have to make the rest yourself, and the knobs on the smokebox sides are about 7 mm long.

54664611406_5e3da98c67_b.jpg

I took the longest brass knobs I had and put the bases in the chuck of my mini-drill. I then filed the upper part (not the ball on the end through which the rail goes) parallel. This gave me the knobs I needed for the tank sides. The very long knobs were made by cutting the ball and a bit of the shaft next to it from some handrail knobs. I soldered the short shaft into some 0.9 mm thin-walled tube, and cut to the required length.

54664611406_5e3da98c67_b.jpg
54664847399_eece8b56fb_b.jpg

You can see the appearance of a few 3D printed parts in the last two pics. I have a few more to be added to the loco next week when I finish the job. Mick Davies, who produced the prints, will be making them available to modellers who are interested in buying the etches. There are also a couple of cast parts available from the BGSoc that will help the job along, but you will have to make parts for the reverser and steam fountain. The etches do include parts to make all the inside motion, but I chose to make mine from a mash-up of LGM castings and Jeff's etched parts.

Surely I'll finish it on Monday?
 

mickoo

Western Thunderer
Please do make sure you sleeve the I/D of that chimney with 8.5 mm OD thin wall (0.2 mm) tube, on it's own the print is silly thin and it'd not take much of a knock to sheer off.

I'd be tempted to solder the tube through a corresponding hole in the smoke box top for a good strong joint and then just slide the 3D chimney over the top at the end.
 

Nick Dunhill

Western Thunderer
Please do make sure you sleeve the I/D of that chimney with 8.5 mm OD thin wall (0.2 mm) tube, on it's own the print is silly thin and it'd not take much of a knock to sheer off.

I'd be tempted to solder the tube through a corresponding hole in the smoke box top for a good strong joint and then just slide the 3D chimney over the top at the end.
noted.
 

Nick Dunhill

Western Thunderer
It is finished. Well it almost was in the last post. I have sorted out the remaining handrail and lubricators, and offered up the spring and hanger 3D. When I had fitted up the handrail on the front of the smokebox I realised the door was too small, d'oh. I quickly orderd a bigger one!

54674242094_2b659c0213_b.jpg

54674242244_81097bd8b6_b.jpg

So here it is.

54673168102_f237c48c77_b.jpg

54674330540_57524ec486_b.jpg

54674242059_8a45ed284a_b.jpg


It is now at Warren H's for a lick of his watercolours. More pics when it's reassembled.
 

Nick Dunhill

Western Thunderer
The Pearson 4-4-0ST is back from Warren Haywood's workshop and has been assembled. It took a while to scrape the paint off all the bearing journals, and, as usual the paint does ingress slightly into the valve gear parts and gums them up. They have to be freed off before reassembly.

54761513878_b500c5a612_b.jpg

54760430707_428b1c4ca2_b.jpg

It is always a nervous time splashing adhesives round fresh paint, but no disaster this time mercifully.

54761623955_2bbfe10eeb_b.jpg

54761514368_3e661a5736_b.jpg

54761623875_5a50bdc435_b.jpg

There's a crew to be fitted in the cab when they come back from the painter. Andrew Stadden made a bespoke pair to match the crew in the picture at the top of this thread. A big tip-of-the-hat to Jeff Ennis for his help, and for producing Premier League etches (available from the BGSoc) and to Warren Haywood for the felt pen action.

 
Top