On Michael's workbench- Penrhyn Loco No. 5

michael mott

Western Thunderer
A small update finished all the riveting, including the forward uprights for the roof /windscreen..... Yes I know that the original #5 did not have a windscreen, but this is my story and I'm sticking to it.
When Lord Montague purchased the run down derelict #5 to run on his estate railway in Meadowlark he ordered the loco to be completely refurbished even found an original Bull nose Morris dashboard for the refurbishment. I understand that he also said it was to be repainted in the Montague Maroon livery.
I have acquired a picture of the dashboard that will be used at the right time.
Capture4099.JPG

Now back to the real world

The wood is Castello boxwood with nickle silver screws around the edges these were turned from some .064" rod and are .041" diameter, the white faces are turned from some 1/4 styrene rod with .041 studs on the back to locate in the dashboard.
the rest are various turnings of brass with a couple of them blackened with Jax Flemish black color

IMG_4101x1024.jpg
IMG_4093x1024.jpg
IMG_4094x1024.jpg

Michael
 

michael mott

Western Thunderer
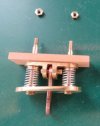
I have been doing my normal one step forward 2 steps back sort of routine, I started by making the stabilizing gear for the bearings, But as soon as I fitted them realized how out of scale and wrong they looked.

IMG_4118x1024.jpg

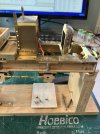
So went back to the photographs and sorted out a new set, there are 6 in all, I made up a couple of new prototypes before settling on a design that look similar enough to the photograph That I can live with it.

IMG_4117x1024.jpg
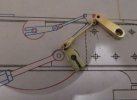
Next up is the odd arrangement of linkages and shafts at the rear on the left side, I drew them as best I could make out from the only picture I have seen.
Capture4110.JPG

T did try bending up some .028" brass rod for the small rods, but I was not happy with the results so turned some down from some 1/8th inch rod, with a ball shape at the chuck end parted it off with the jewelers saw, the lathe was stopped then flied it flat so that I could drill it out.

IMG_4119x1024.jpg

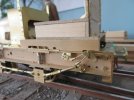
Fiddly little bits, I have no idea how the folks work on the 2mm running gear, this stuff is getting as small as I can handle these days.
IMG_4123x1024.jpg
I suppose I shall have to get on with the engine now that I have most of the rest done.

Michael

 

michael mott

Western Thunderer
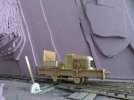
I took a little break and did a little work on the small boat I am also working on, and being a bit at loose ends for a few days I decided that I needed a proper photo stand for taking pictures of Welsh slate mine locos and wagons. The overall size is tight for 7/8th scale but it will have to do. I was inspired by Stephen Fay's work and the photo I stumbled across in a old copy of Railway bylines,
IMG_4240x1024.jpg

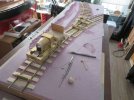
So with an already existing board that is 15 1/2 inches deep by 48 inches wide I stuck a bit of 1/2 inch pink foam down and got going.

IMG_4257x1024.jpg


My thoughts are to mimic the large flat slab of slate as the main backdrop with the mine entrance to the left side with the rock face wrapping around and sloping down to the track level. I have quite a bit of a very dark grey slate that forms the edging around the front grass of my home. There are a few slabs that are constantly flaking with the freeze thaw of our winters and summers, and I have been collecting it and crushed a bit between a couple of 1/4 inch steel plates.

IMG_4261x1024.jpg
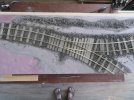
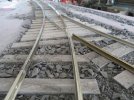
The Fothergil switch will be operable but is needed for the photo opp0rtunities even though it is switching to a very short spur.
a couple of low angle shots. It all need spiking down yet. It is a nice change to play a bit with the landscaping.

IMG_4263x1024.jpg

IMG_4264x1024.jpg

rail is code 215 and gauge is 45mm representing 2 foot or 1 foot 11 1/2 to be more precise but I am having fun regardless.
having the ability and stuff lying around to be able to switch gears so to speak helps to keep the juices flowing.

Michael
 

michael mott

Western Thunderer
Have been doing a bit of household work mainly in the garden installing some rain barrels, but have also been picking away at the photo-stand.
The fothergil points are a bit fiddly yo get working just right. I built the first point lever stand like this
Capture4285.JPG
It did not work as well as I thought it would, and so decided to do it differently like this.

Capture4288.JPG

It worked really smoothly first time.
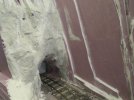
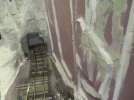
So got on with a bit of basic foam installation, it obviously needs a fair bit of work to make it look like the photo of Dinorwic in the Bylines magazine, but it is a start.
IMG_4293x1024.jpg


IMG_4296x1024.jpg

IMG_4297x1024.jpg

IMG_4298x1024.jpg

IMG_4299x1024.jpg

I know that there was pink granite but not slate I prefer this type of foam for some tasks though.

Michael
 

michael mott

Western Thunderer
Thank you Chas I appreciate it, I will get back to finishing the loco once I have gotten the card loco finished. I tend to work on multiple projects at the same time and go at it until I run into a blank on some part of the project and have to wait till the answer comes or just run out of enthusiasm then pick up the next one and so on. They cycle through and get done eventually. Currently I am waiting for some brake through on the clasp brakes on the 4 wheel parcel van. I also enjoy the purely creative approach and making up oddball Victorian eccentricities, which allow for a lot of flexibility.
Michael
 

David Waite

Western Thunderer
Hi Michael
Thanks for the timber information and the link to your Work Bench what can I say except your workmanship is truly outstanding, having
worked in a machine shop as part of my trade [but in heavy engineering] I appreciate the skills involved my eyes are now failing faster than I would like so seeing what you have done is such a joy, I like the Honeycomb Radiator my father would often talk about them as they were a easy fix if one sprung a leak he would just solder off that segment.
David.
 

michael mott

Western Thunderer
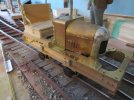
Well now that my modelling mojo is back it is time to get back to some serious modelwork. I have begun drawing up the engine, there are lots of photos of the bullnose engine but I have not found any drawings of it. So at present doing the best I can from the photos. in order to sort out the mounting and hiding the toy motor I needed to remove the bonnet and the rear bodywork.
IMG_3569.jpeg

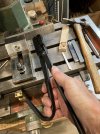
could I find the tiny socket wrench that I used....no and I discovered that my eyeball hex heads were a bit random dimension wise not much more than + or - three or for thou but enough to annoy me. and having now a die for making small hex stock, after finally getting the first bolts out drew down some stock. It takes a fair bit of effort pulling the first few sizes
IMG_3567.jpeg

starting with .125 brass rod I made some .108" some 082 " some .117" then threaded some of the .108 and .082 to replace the hand filed hexes. I'm always surprised at how small some details are even at seven eighths scale. feels good to be back working on this loco.
bed time now.
Michael
 

Attachments

  • IMG_3568.jpeg
    IMG_3568.jpeg
    155.4 KB · Views: 12

GrahamMc

Western Thunderer
It takes a fair bit of effort pulling the first few sizes
Hi Michael. I'm guessing you're using a lubricant but for others who aren't familiar with the process the usual lubricant is beeswax. I've used washing up liquid in the past. Almost anything will do, soap for example. That and annealing after every few pulls makes drawing a lot easier. Most of what we buy comes in a hardened condition after drawing.
 
Last edited:

michael mott

Western Thunderer
Hi Michael. I'm guessing you're using a lubricant but for others who aren't familiar with the process the usual lubricant is beeswax. I've used washing up liquid in the past. Almost anything will do, soap for example. That and annealing after every few pulls makes drawing a lot easier. Most of what we buy comes in a hardened condition after drawing.
Hi Graham yes indeed I Am using a lubricant I have used beezwax or oil at various times. I also tend to anneal after each draw. The smaller diameters are certainly a little easier.
Michael
 

michael mott
Western Thunderer
Glad to see you back at the bench!

Tim
Thanks Tim,
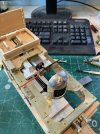
Today I went to the hobby shop and picked up a better electric motor one that was smaller but surprisingly quite powerful. The price was only $7.99
IMG_3570.jpeg
It tucks right inside the rear part of the bodywork, and runs on a single AA I had originally planned on three AAA under the seat to give 4.2v now i'm thinking that they could be in parallel.
IMG_3572.jpeg
this is going to make building and mounting the Engine so much easier.
Michael
 
Top