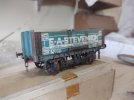
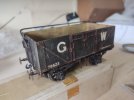
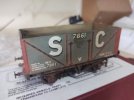
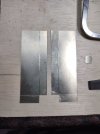
Pete's own models.

Peter Cross

Western Thunderer
The 12 ton van has had the roof and underframe painted. I've also managed to letter one side. This is a mish mash styles. It has the large SR, but the rest is post 1936 lettering. This is how a few were painted when new. No it's not made up there's a picture in southern wagons volume 4.


IMG_20210413_224327002_resize_7.jpg

Hopefully the other side in the next day or so.
 

Peter Cross

Western Thunderer
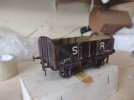
The SR van has been finished, given a coat of matt varnish to seal the transfers and to bring it all together. The buffers and couplings blackened and fitted.


IMG_20210416_224238999_resize_11.jpg IMG_20210416_224222567_resize_26.jpg IMG_20210416_224319610_resize_11.jpg IMG_20210416_224305719_resize_61.jpg


Just need to get the weathering powders out now.
A result as far as I'm concerned, not bad for only costing twenty quid or so on eBay.
 

Peter Cross

Western Thunderer
Here we go again.
This time it's another van, an ex LSWR one from ABS models. I'd like a few more of this type as there are a load of variations you can do.

IMG_20210403_220357327_resize_43.jpg

I start off by cutting out the wooden panels. But, they don't tell you, that you get the door, 2 side pieces and an end from each piece. I got it wrong and had to join some bits together to make up.an end.IMG_20210404_221313442_HDR_resize_51.jpg

IMG_20210404_221336120_resize_63.jpg
IMG_20210405_193338652_resize_48.jpg

Just to show that it was a rebuild


IMG_20210405_193356831_resize_91.jpg

I also cleaned up the sides and ends, soldered them together ready to fit the panels. You'll of noticed I've numbered the parts so I know what goes where without having to try them all again.

IMG_20210405_223737109_resize_76.jpg

More soon.
 

Peter Cross

Western Thunderer
I wasn't happy with the axle box casting. There was extra white metal on the sides. This was removed with a watchmakers screwdriver sharpened like a wood chisel. Hope you can see the improvement.

IMG_20210405_212402500_resize_96.jpg

The previously cut panels were now glued in, and a 1mm wire was drilled and soldered in place hopefully to stop any likelihood of them being pushed out when being handled.

IMG_20210406_224915704_resize_73.jpg

After the basic box had been soldered together the brakes were added. This was simple as it's one sided Morton ones.

IMG_20210407_224428040_resize_78.jpg
IMG_20210407_224411983_resize_77.jpg

As it's a more or less straight out the box build its progressing quite quickly.
 

Peter Cross

Western Thunderer
Here we are ready for painting, how nice it is when you can do an out of the box build.

I added a floor, you have to stop the goods in transit falling out.

IMG_20210407_224441012_resize_91.jpg

Stiffening ribs for roof and and sides.


IMG_20210407_224513291_resize_59.jpg


Buffers and end vents sorted and fitted. I also forgot to say in the last post that the sliding door handles were cut and fitted, I did round off the ends of these to try and stop them snagging, as only glued on.

IMG_20210407_224458193_resize_74.jpg


Finally the roof was formed, cut and fitted. Which I attached using an impact adhesive.

IMG_20210408_222426467_resize_3.jpg
IMG_20210408_222341201_resize_88.jpg

Buffer beds and coupling just fitted for the photo. Most unusual for me I normally deal with these at fitting stage after painting.
 

Peter Cross

Western Thunderer
And here we are finished. Black underframe, and white roof.
I am pleased the way it turned out. Now all I need to do is wait for these and the LSWR 5 and 3 plank wagons to be reissued by ABS, or whatever name they will be back as.
Well, here are a pictures.

IMG_20210416_224345429_resize_55.jpg
IMG_20210416_224429990_resize_1.jpg
IMG_20210416_224405519_resize_43.jpg
IMG_20210416_224442053_resize_46.jpg


And the two of them together......


IMG_20210416_224558679_resize_6.jpg


Not the best photo in the world, I put it down to me being tired, and having blurry eyes.
 

Peter Cross

Western Thunderer
I got out my 0395 class to see where I got to, and why I haven't finished it after a few years.
Well, it's lined the cab interior was not painted, no transfers fitted, plus I couldn't remember the number it was going to be.
I got the paint brush out and started on the cab interior. Found the cab plates I had made by mistake, also from narrow planet were the builders plates. That are to big. I decided to file the edge off, they are still a little large, but they look so good.

IMG_20210517_215926102_resize_80.jpg
IMG_20210517_215939500_resize_36.jpg

Pictures show up my poor painting and lining.

Now, back to why it's not finished. Apart from the bits already mentioned, I've lost the reverser reach rod, so that needs replacing. But I can't find my SR loco transfers, I thought I had a new sheet. No I bought a new sheet of SR wagon. That will take some months to sort out which is a bu@@er. I also stole the back head for another project. I must stop doing things like that. But I will be placing an order with Laurie soon I need a whole load of bits for my X6 build. I know I have a back head for the 700 class, are they the same, stop it Peter your doing it again.
Anyway, after I've put it back together it'll be back in the box for another few months.
 

Peter Cross

Western Thunderer
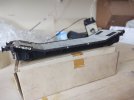
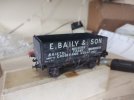
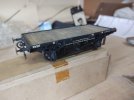
Here are a few more bits of stock that are mine.

Here is an ex LSWR machinery wagon built from a Dragon kit.
IMG_20210103_153945984_resize_13.jpg

Next a PO wagon Baily from a Slater's kit.

IMG_20210103_154206625_resize_94.jpg


A GWR container wagon from an ABS kit I think.

IMG_20210103_153810085_resize_44.jpg


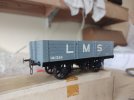
An LMS 5 plank open from a Haywood's kit.

IMG_20210103_153700828_resize_20.jpg

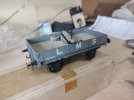
Another LMS wagon. A bolster this time, ex CR again a Dragon kit.

IMG_20210103_153846487_resize_51.jpg

Here's an ex LSWR 5 plank round end, ABS kit.

IMG_20210103_153510375_resize_81.jpg

A PO 4 plank open, built from a POW resin kit.

IMG_20210103_154059959_resize_63.jpg

A GWR 7 plank, again from an ABS kit.

IMG_20210103_153614400_resize_76.jpg

Finally for now, an S&C PO 7 plank wagon, again from a Slaters kit.

IMG_20210103_154334968_resize_18.jpg
 
LSWR/SR T1 BUILD start.

Peter Cross

Western Thunderer
To try and get motivated again, I thought a new challenge would help. Although I have lots to get finished, I feel it's all gon stale. In part the length of time they've been on the bench.
So a simple scratch build was called for. I have no wheels etc for it. But I don't to be that far by June.
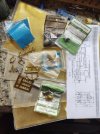
Here is what I have in the arsenal to start with. There are probably half the parts in the photo not going to be used. But there is the right dome and chimney. Some springs for the frames, lamp irons, plus oilers Ang boiler fittings. A good start I think. Zed
IMG_20220312_151548884_resize_82.jpg

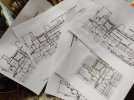
Battle has began, after getting the drawing to scale by sizing on the printer I printed out enough copies to cut up and to have a master. I check that they all have come of the printer the same size. I have known them to reduce across the width of the paper. I did do a wagon drawing where the height was reduced by 2mm but, the length was correct.


IMG_20220317_102735586_resize_98.jpg


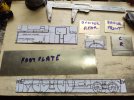
Next part, to cut out the major parts from the drawings, side tanks an cab, splashers, main frames. I must do the front profile drawing, ready for the cab front and rear sheets. I also cut out some 010" sheet for the body and some 018" for the frames.


As I had a spare half hour I did some cutting.

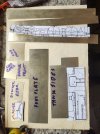
Now I have a T1 loco kit.

IMG_20220317_112902021_resize_52.jpg


At the top are the frames, with the spacer strip in the centre. I have a feeling I should of made it 25mm not 24. It is using thinner frame material than I did last time. We will see later.

To the left are the cab and bunker fronts and rears, all correct width but over long. The splasher outers are there on the bottom.


In the centre, the footplate is cut to size.


To the right the footplate are the two cab, bunker and tank sides. I did forget to put in the photo the combined tank inners and tops.

Now with a little soldering, pasting of drawings, I shall be able to make some finished parts.
 

Peter Cross

Western Thunderer
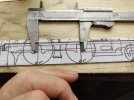
I've been ask how I cut the blanks for my scratch building. Well, I did a video, which I hope helps you. I just wish I'd given myself mor elbow room under the camera. I'm cutting 010" nickel silver, it works for me up to 018" nickel sheet. I've not tried thicker as yet.

I hope this will be of interest and of use to you.


Peter Cross

Western Thunderer
In this part of the T1 build we join the blanks for the parts that we need two off. I do this by cleaning the two faces that need to go together, cover with flux, I hold them with mini bulldog clamps, then run around the edge with solder. The larger parts I'll tin then use the mini blow lamp from both sides to heat evenly.

Here I have joined the frames together and cleaned up the outside ready to past the drawing to them.

IMG_20220318_090039087_resize_59.jpg

Next I glue the drawing using pritt stick. This holds the drawing well,yet is easy to remove. I also check that the drawing has not stretch due to the moisture of the glue.

IMG_20220318_090351322_resize_66.jpg

Other parts followed the same processes.
IMG_20220318_093019832_resize_89.jpg

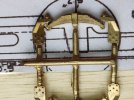
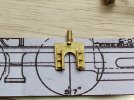
I had find some springs earlier, and they seem to fit very well.
IMG_20220318_083409570_resize_77.jpg

I also remembered I had some old Four Track horn blocks and guides. These will be just the job for the compensation.

IMG_20220318_083350655_resize_88.jpg

Lastly for now the tank tops and inner sides, these are new. I managed to lose the pieces I originally cut out.

IMG_20220319_215315809_resize_94.jpg

I think it will be out with the piercing saw next visit to the bench.
 
Top