SimonD’s workbench

Pencarrow

Western Thunderer
Thanks guys,

There seems to be some conviction regarding the darker bricks. It would seem more logical to use stronger bricks for lower courses, but it’s a sand furnace, rather than a bridge, and it has steel framing too. Why would the builders feel the need to use higher quality (higher cost?) bricks in a low level, low stress structure? Would the fire have something to do with it, and they just made it consistent all round at Didcot, but not elsewhere?

anyway, I’ll apply a coat of something, at some point. Would have been easier before I assembled it :(

(regrets, I’ve had a few, but then again too few to mention :)) )

The engineering blue bricks were often used in lower foundation courses of buildings as they are less susceptible to damp and frost. Can't really see the point in using them on a small low building with a steel frame, particularly one that's heated to dry sand. Despite this they are obviously used in the rebuild at Didcot.
 

simond

Western Thunderer
Thanks Fraser,

Confident it is not a reconstruction, there’s a photo of the rebuild of Didcot in Griffiths’ book, “a couple of months after opening” showing it in its present location. 1932 iirc.

But they were not used in the adjacent, and contemporaneous, main building.

cheers
Simon
 

Osgood

Western Thunderer
Perhaps more strength below the floor of the furnace was deemed necessary due to heat build-up?
But they may not be proper engineering bricks at all if say blue (or varying coloured) Brindle type facing bricks were used.

And what did the furnace look like - iron or brick?
Might it have been something as simple as an iron plate serving as both the top of a brick furnace and the floor at same level as the iron drop-down platform, upon which damp sand was shovelled, being later shovelled off when dry into containers at building floor level?

From your informative post Fraser, for the Watham bridge should we consider only the three arch rows and coping and plinth bricks to be proper engineering grade, and the rest Brindle facing of varying colours?
Or could they perhaps be engineering seconds?
 
Last edited:

Overseer

Western Thunderer
Perhaps more strength below the floor of the furnace was deemed necessary due to heat build-up?
But they may not be proper engineering bricks at all if say blue (or varying coloured) Brindle type facing bricks were used.

And what did the furnace look like - iron or brick?
Might it have been something as simple as an iron plate serving as both the top of a brick furnace and the floor at same level as the iron drop-down platform, upon which damp sand was shovelled, being later shovelled off when dry into containers at building floor level?

From your informative post Fraser, for the Watham bridge should we consider only the three arch rows and coping and plinth bricks to be proper engineering grade, and the rest Brindle facing of varying colours?
Or could they perhaps be engineering seconds?
“Engineering bricks” is really just a marketing name for bricks with high compressive strength. The blues were sold as engineering bricks which happened to have a consistent colour which works as a contrast to red or yellow bricks so became popular with some designers. An brick arch bridge doesn’t need really strong bricks but they can help with longevity in harsh climates.
 

simond

Western Thunderer
I don’t know what the furnace itself was like, as I didn’t go inside the building when I visited Didcot. I guess I should have just asked, I’m sure they would not have minded.

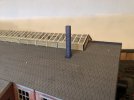
I’ve just found a better picture of a more ornate stovepipe, so I’m improving my CAD, it’s always nice when you find it before you did all the support work and hit “print”…

Again Griffiths, tight crop for illustrative purposes, (c) BR/OPC

IMG_8493.jpeg
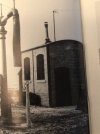
Kidderminster, Feb 1932. Again, darker bricks at the base of the sand furnace. Ho hum.
 

Pencarrow

Western Thunderer
I don’t know what the furnace itself was like, as I didn’t go inside the building when I visited Didcot. I guess I should have just asked, I’m sure they would not have minded.

I’ve just found a better picture of a more ornate stovepipe, so I’m improving my CAD, it’s always nice when you find it before you did all the support work and hit “print”…

Again Griffiths, tight crop for illustrative purposes, (c) BR/OPC

View attachment 203111
Kidderminster, Feb 1932. Again, darker bricks at the base of the sand furnace. Ho hum.

Definitely darker than the bricks above, so definitely a different brick. What's really getting me is how light the darker bricks are compared to the steelwork and other dark areas in the photo.
 

simond

Western Thunderer
Hi Phil,

I guess it might be possible, but I think it might be a little pointless.

The gaps underneath would be filled by glue, and the flashing is a scale half inch thick (0.29mm) and whilst it’ll print a bit thinner, I doubt it’ll be reliable, and I’m not confident of getting a good fit to the wriggly stuff! It you want to pop a couple of offcuts of the corrugations in the post I’ll have a go, if you like.

cheers
Simon
 

simond

Western Thunderer
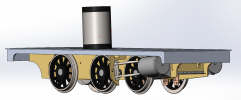
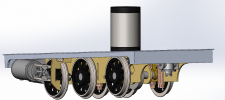
A little loco progress, or a progress with a little loco or something, Chris' @Pencarrow 1366 Pannier and my 1361 Saddle tank will share common chassis design.

Screenshot 2023-12-06 221701.png


Screenshot 2023-12-06 222237.png


It's all a bit experimental at the moment, but we shall see...

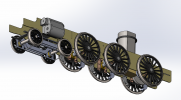
Been playing with a slightly larger loco too - it's a chassis for pal, Tony's Manor

Screenshot 2023-12-06 222530.png
3D printed (dummy) springs, but CSB on the bogie and the frames. Will be interested to see if it all works.

cheers
Simon
 
Last edited:

Pencarrow

Western Thunderer
A little loco progress, or a progress with a little loco or something, Chris' @Pencarrow 1366 Pannier and my 1361 Saddle tank will share common chassis design.

View attachment 203438


View attachment 203439


It's all a bit experimental at the moment, but we shall see...

Been playing with a slightly larger loco too - it's a chassis for pal, Tony's Manor

View attachment 203440
3D printed (dummy) springs, but CSB on the bogie and the frames. Will be interested to see if it all works.

cheers
Simon

Experimental stuff looking good Simon.
 
N6 loco coal wagon

simond

Western Thunderer
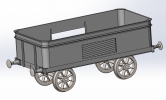
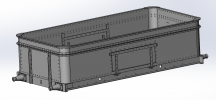
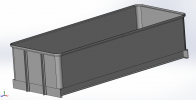
the hypothesis…

1702587250937.png
The reality

image.jpg

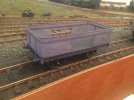
Whilst it looks like its had a bit of a serious battering due to warping of prototypically thin sections (and that, in itself, might be attractive from a modelling perspective), I’m surprised and delighted in equal measure that it is apparently entirely possible to 3DP a wagon in one piece, even if it does take 8 hours.

This is an N6 loco coal wagon, with iron mink-style rounded corners. There doesn’t seem to be any obvious banding except at one end, and even that is more distortion than surface defects.

I think a little beefing up of the solebar channels will be beneficial, I need the W irons before I can do that, they’ve been ordered. The solebars are really not very good!

The body sheeting needs to be a little thicker too, the model is currently 0.3mm, and I think 0.5 will work, and this coupled with some doors, will make the bodies stiff enough to be useable.

I shall persevere with rivets and other details - watch this space!

cheers
Simon
 
Last edited:

simond

Western Thunderer
1702848824746.png

I tried to count the rivets, but got lost several times...

I see a chap on RMWeb has done the same wagon. Looks to have made a very decent job of it. He seems to have made the body in two halves with a separate floor and chassis. My approach is one piece.


Should be printed some time in the early hours. I'll wash it over breakfast and stick it in the curing chamber before work.

hopefully it'll print ok. Same orientation as the last one. I've thickened the sheet metal to 0.5mm and have also tried to improve the solebars by a bit of subtle thickening too.
 

simond

Western Thunderer
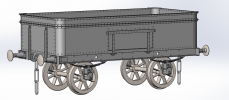
the axleboxes are not in the right position relative to the axles here, but a flavour of how the N6 should look, I hope

1702852290338.png
obviously no W irons or brakes. I think I have missed the stiffening angles in the corners of the buffer planks/solebars - drawing is not super helpful, so I'll have to work from something similar. Iron mink perhaps. Still not sure about the door hinges either. Has anyone got any useful pictures?

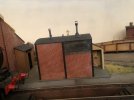
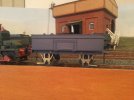
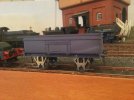
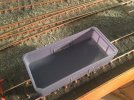
Talking of pictures, there is an iron "thing" next to the sand furnace at Didcot. Neither Phil's @BrushType4 nor my own photos - SimonD’s workbench - show it in its entirety but it seems to be used for firebox grate irons at the moment - I wonder if it is actually a repurposed iron coal wagon body. I don't suppose anyone has any better pictures of it?

cheers
Simon
 
Last edited:
Top