Right, time to kick this bubble along a bit, are we all sitting comfortably, if so mad Mick the half Dane will tell y'all a bed time story.
It started over the Easter weekend at York which is where I picked up the UP Dash8-40B seen previously, first off after parting with a thick wedge of cash for 'one' N&W book I stumbled across this.

Now I have no idea what scale it is but it looked very impressive, I didn't even recognise the builder

and just kept staring at it, it wasn't a train for a starters but it was a warship (yes that anorak started to flap furiously in the cupboard to be let out!). Eventually I started to look closer and whilst looking very good had one or two flaws and then I noticed the stand, the lack of a loud tropical shirt being a very good camouflage ploy

.
Now to be fair, they/he, do/does come in for some criticism and whilst the model isn't perfect said builder was very proud of his efforts and thoroughly enjoying himself and stepping back whilst trying to keep a fresh mind, I wondered what he saw that some of us don't.
Anyway, moving on I was soon accosted mid stride by a commanding voice "do you like america railroads?" now we shouldn't judge folks by their looks but this guy looked like the type that sits next to you on the bus and whispers "do you want to see my atomic bomb" whereby they open their Sainsburys bag and show you a tin of baked beans! I said "sort off" and was promptly escorted to their stand and lo this little beauty.
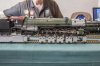
It looked like a cross between a RTR and a brass import, new wheels as well so I was reliably told, Who's I asked? Well those of course, he didn't know and to be frank he didn't look like he cared too much either.
Clearly two rail and an overly large tender gap to allow it to go around a four foot curve

.....this is O gauge after all, but it still looked impressive.
I can make it go if you want said the proud owner, okay lets see it move, expecting said beast to wallow and rock all over the place, as is the want of pretty much every engine I've seen on rolling roads like this, more so eight coupled wheels capably of going around a four foot curve. But no such thing it simply purred along with out the slightest trace of body roll or rock, I couldn't even detect if the axles were moving up and down so the 'new' wheels were turned to absolute perfection. Mind if it's weighted like a typical American model then I suspect the table was flexing under each wheel whilst the engine stayed stable.
Two more locos were procured for viewing, one from a large pile of bubble wrap on the floor


The other already on the bench.
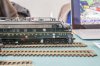
Neither are perfect and show traits we often associate with American three rail, but the over riding thing about the whole episode was the owners pride and joy in his stock and he really didn't care if they were not perfect.
Finally I cam across the Narrow gauge society and this monster.
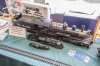
I have no idea what scale it is but recall saying out loud "want one" at which point some one promptly told me all it's imperfections, at which point I walked off, I didn't care if it was wrong, I'd still have one despite all of his criticisms. Maybe it's because I'm not clued on on these items that they look so good.
So where is this winding tale leading? It's leading right here. Having spent the last week doing nothing but B1 etches for 16 hours a day and one 31hr over nighter, I'd just about had enough of high fidelity detail work and decided to try and catch something that those at York clearly had.
Several conversations over the York weekend and seeing Daves GP9 as well as a win on Ebay see's a Red Caboose GP9 winging it's way across the ocean shortly but before then and before the etches come back from PPD in a couple of weeks I decided to resurrect the 'pig' and try to put some lipstick on it.
It gets a lot of stick for it's shape or lack of but looking at it I wasn't seeing it and it is a engine I do have a lot of information on, so I decided to sit down and work out exactly what was wrong with it.
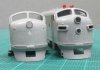
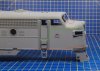
As a reminder this is a photo I took nearly four years ago of the 'pig'
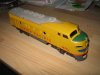
Four years in the dark loft hadn't turned the ugly duckling into a swan I'm afraid and to be fair the appalling UP translucent paint scheme wasn't helping see the shape very well at all.
A quick strip down and spray in primer reveals a different view.

Primarily we are looking at the nose shape and from this point I have three options.
1: Keep as a F9A and tart up as best possible or try ot convert to a F7A
2: Clean it all up and use it as a basis for an Australian A class (broad gauge though) and procure another shell for the other cab or GM (standard gauge)
3: Total strip down to retain just the cab with a whole new etched shell behind for an Australian CLP, this option might be viable for either of the above as well.
Overall I'm looking for something that'll make me happy and I won't get overly upset if a riveted strap is in the wrong place, i will if i put it there as there's no excuse, but if it's already there then it can stay.
Clearly the 'pig' has issues and is going to need a lot of lipstick to get anything useful from it, but looking at what others have done and re looking at Jordans SOO version (think this was the same shell?) then it's got potential.
So, what is actually wrong with the shell out of the box. I personally thing the overall shape is pretty good, the eye being conned by some particularly loud and incorrect peripherals.
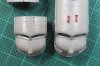
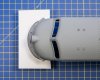
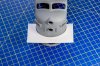
First up are the number boards.
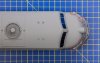
Side on they don't look too bad, but from above and from the front it's clear to see the housing is totally wrong, the sides should be at 90° to the face, not beveled. This is not correctable other than total removal and new ones being fabricated, handy for the Aussie candidates.
Side on
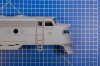
Okay some issue here, the pilot has to go, big hole in the front and looks like it's made from 4" steel plate, an etch here will add fidelity and the remains of the pilot where it joins the body can be rounded off a little more like the real thing. Same applies to the side skirt, too thick so an etch replacement is the way to go....if the chosen model sports it.
Cab door steps, well just wrong shape and size, they are indeed part of a single sheet that goes up and around the cab door, so hand rails off, steps off and new overlay which will also correct the door opening. Cab door window, there's several different versions, some square like this, others with more rounded corners and I'm pretty sure the door is over wide, so the whole door goes and replaced with an etch that suits the panel overlay mentioned above. Finally we come to the biggest elephant in the room, the cab side windows, there's an inset bead around which is on some engines but most don't have this, so the windows need opening out by removing the bead. Once that's done it needs to be made narrower with a thin strip fore and aft to narrow the opening and making it look more like the real thing.
Finally the gutter over the windows, it's way too low and is giving the whole side a compressed look, moving it up to the right location will open out that whole area and change the way it looks.
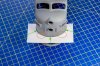
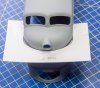
From the front.

Okay those number boards really show up the wrong shape as does the door stuck on, it needs to be flush so that needs coming off and a new opening scribed in or a new etch door in the open or ajar position might be a nice detail. The plough or skirt we've mention before and so we come to the windscreens.
This is where it gets real complicated as there are two sizes of opening, or so it would seem, the model is perhaps a little over large so a thin strip of plasticard around the inside would help, the other issue is the actual opening. Some engines have a hard edge, some are more rounded and over time many have had replacement windscreens. Those with larger openings have glazing just inserted and match the model a little closer, those with smaller openings actually have the larger opening but inside is a secondary fitting with rubber surround, only really visible up close. On the Aussi locos they just bolted a plate inside with the new windscreen framing so easy enough to replicate if going down that road.
So a quick brush montage.

Top is clearly the model and the overall shape and rake angles look pretty good but the cab roof to screen radius probably needs opening out; in profile the peak looks a little harsh.
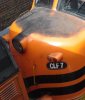
Next up is 1100, not higher gutter, cab door shape and window and side window has insert bead and gutter moving on the model might make it look a better match though it might need narrowing on the rear edge a touch, 1100 also has the larger style windscreen opening matching the model a little closer than others.
2500 is a later model with larger cab door and window, cab side window without inset beading and windscreen with insert framing gives a smaller opening, there are other classes with even larger inset framing giving an almost letter box appearance.
Finally an Australian S class, S312 clearly shows the heritage with it's US cousins, in fact the shells are almost identical, the Australian engines are slightly narrower though the records do not note where or how, but all the cab doors are inset as are the hand rails, the difference is around 50-100 mm which moving the handrails inboard would account for. S312 also has inset windscreen framing giving it the letter box look, only the A class with their rubber beaded inset are smaller. Car body is close to the F unit but in reality might be easier to make a new one.
So taking stock, were do we go with this 'fun' project, given that almost all of the detail has to come off the front from behind the cab door forward, bar the main head light and anti climber ribs then you've an open door to rebuild back to a US F9-unit or go gung ho and have a full rebuild to an Aussi unit.
The A class would require two cabs and virtually everything trimmed back to core skin.

New inset windscreens and etched roof hump are easy enough to and new body side grills and paneling are not a great issue.
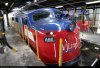
The CLP is a bigger upgrade and they really look good in QR's new colours.
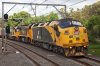
About the only thing that remains in these rebuilds is the cab, the new body shell being angular lends it's self to etch replacement perfectly and just go to love those skylight portholes! It'd need new recessed cab doors, true of all Aussi engines. Windscreens are the same size as a US engine with standard inset frames, however on these rebuilds they just put a thin plate across the whole front and bolted the new frames in from the inside, the original opening still present inside.
One other trait the Aussi engines do not seem to suffer from, is the slight crease in the nose under the headlight, it's visible on US engines and on some original doors, but many seem to have been built or more truthfully panel beaten over the years that the crease is often hardly visible.
So to bring the tale to an end, the 'pig' is on the bench and I'll run with it for a couple of weeks to see where it ends up, I'm not overly worried about the running frame at the moment, the idea being to just do something very left field, something that when you walk in the room go Oooh but doesn't necessarily step up to the micrometer.
If the project goes down under I'll keep it here under my US headings, they are after all, GM units
Copyright rests with original owners, images shown for indication purposes only.
MD




 towel? I don't know to be honest, I honestly don't see the issues you see, but maybe that's because I don't want to see them which was the point alluded to above in the York show when 'people' watching. I have Finney7 to catch all of my caring and seeing and detail and crawling all under engines and over drawings, which is not a bad thing as that playground is a world away from this one.







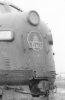

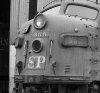
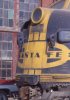



 and I don't have to fit all those pipes!!