7mm US model dabblings

mickoo

Western Thunderer
Dave, I am tempted to repaint to CSX YN2 but I also like UP...a lot! So I think it'll stay in UP colours as the decals are pretty good overall.

The idea of the digital vernier is to replicate in metal other Dash8-40Bs, I.E but not exclusively, CSX, NS and SSW.

Now I know you shouldn't really scale of other kits, but without any other solid information to work from it's the best I have right now (and probably ever will have), besides, if I don't know any better I won't loos any sleep over it :cool:

I don't think the CSX engines are long for this world and I've a niggle I read somewhere that many are de rated to Dash8-32 or even 30B.
 

oldravendale

Western Thunderer
.....I wish I understood what's going on here......

Lovely US locos, though. But I remember those great hoods. I'll never forget being in Wilmington, Ohio (when working) and the noise of the hooters of those freights throughout the night. (If one discounts the noise of the freighter aircraft coming in to the freight centre overnight to collect our freight via Airborne). That was an amazing business.

B
 

mickoo

Western Thunderer
Well it's very simple, our natives across the water tend to call it as it is, County Line Road, Creaking Frog River....you get the idea.

Broken down Dash8-40B is the GE name for engines in the Dash8 range, there being Dash7 before and Dash9 after, each a logical progression of technology or power. The -40 is the engine horsepower (there are many variants not just the 40), in this case 4000Hp. That's quite a lot through four axles which puts these in hot shot territory (fast timed freights) where the power is required at higher speeds but less starting effort is required, the max power band being in the 30-50 mph range. The B is the number of axles on the truck (bogie)

There is of course a Dash8-40C and you've guessed it, pretty much the same but with six axles (three per truck) these are designed more for lugging long coal trains or heavy freights up big hills, same power but more tractive effort with a power band in the 10-30mph.

The B model ended with the Dash8 line, from Dash9 onward they are all C models.

There is no Dash10, the next step was the GEVO (GE EVolution series). Unlike previous upgrades for power and technology the GEVO is driven purely by emissions dictated by global policy. GEVO is capable of meeting Tier II levels but the current range is now Tier IV.

With the GEVO GE started to rationalise it's design and models offered to buyers and forms three basic classes, ES44AC, ES44DC, ES44C4 (unique to BNSF), broken down it's Evolution Series 4400Hp AC traction motors or DC traction motors. The C4 is a unique way to try and increase tractive effort and only BNSF took up the option.

There are a few sub variants, primarily the 'Heavies' ES44AC-H engines built with extra slab steel plate to increase the overall weight and radial (steerable axles) to gain extra traction, mainly on CSX.

UP also operates a 'Heavy' but without the radial trucks, technically not a 'Heavy in GE books due to the lack of radial truck.

A standard GEVO has six axles and six traction motors and tips up around 190 tons giving an axle weight of 31 tons or so; to try and increase adhesion BNSF noted that more motors did not always mean more power, what they wanted was more grip but without increasing the overall weight and went for a four motor six axle set up, basically an A-1-A A-1-A wheel arrangement. under normal conditions each axle still takes 31 tons but under high starting loads the middle un powered axle is lifted y linkages. The reduction in weight capacity on that axle by virtue of physics increase the weight on the other driven axles, by how much isn't public knowledge....not that I've found. The only down side is that your track has to be able to take the extra axle loading which BNSF obviously can.

Whether it works or not is mute, drivers hate it calling them slippery, but BNSF have bought order after order, citing the loss of two motors to maintain a big cost benefit. In reality the C4 is probably not any more sure footed than the standard unit, but it's probably not much worse either so the maintenance cost benefits will be the under lying red line in the ledger.

Moving on the world upper the emissions regulations and now we're looking at Tier IV, GE hit the market with the ET44 (Evolution Tier IV) series and the catalogue offers two basic types, the ET44AC and ET44C4.

Anyway, here's a really good video of a GEVO doing what GEVO's do best, in this case an ES44DC.


Watch closely around 1:20 and you'll see it loose grip and slip sideways due to the cant, then when it grips again it'll keep trying to go straight and climb back up to the outer rail and then slip back down again. At 2:40 you get a close up of the slip control in action and you can see the wheel hubs twitching as it losses and gains grip. The standard cab Dash9 behind seems to be handling it better with less slip, more as likely the GEVO has taken the film off the rail head ahead of it. Neither engine seems to be using sand which is odd.

And...you probably didn't need or want to know any of that :D
 
Last edited:

mickoo

Western Thunderer
Right, time to kick this bubble along a bit, are we all sitting comfortably, if so mad Mick the half Dane will tell y'all a bed time story.

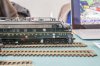
It started over the Easter weekend at York which is where I picked up the UP Dash8-40B seen previously, first off after parting with a thick wedge of cash for 'one' N&W book I stumbled across this.
IMG_9861.jpg

Now I have no idea what scale it is but it looked very impressive, I didn't even recognise the builder ;) and just kept staring at it, it wasn't a train for a starters but it was a warship (yes that anorak started to flap furiously in the cupboard to be let out!). Eventually I started to look closer and whilst looking very good had one or two flaws and then I noticed the stand, the lack of a loud tropical shirt being a very good camouflage ploy :cool:.

Now to be fair, they/he, do/does come in for some criticism and whilst the model isn't perfect said builder was very proud of his efforts and thoroughly enjoying himself and stepping back whilst trying to keep a fresh mind, I wondered what he saw that some of us don't.

Anyway, moving on I was soon accosted mid stride by a commanding voice "do you like america railroads?" now we shouldn't judge folks by their looks but this guy looked like the type that sits next to you on the bus and whispers "do you want to see my atomic bomb" whereby they open their Sainsburys bag and show you a tin of baked beans! I said "sort off" and was promptly escorted to their stand and lo this little beauty.
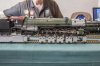
IMG_9863.jpg

It looked like a cross between a RTR and a brass import, new wheels as well so I was reliably told, Who's I asked? Well those of course, he didn't know and to be frank he didn't look like he cared too much either.

Clearly two rail and an overly large tender gap to allow it to go around a four foot curve :eek:.....this is O gauge after all, but it still looked impressive.

I can make it go if you want said the proud owner, okay lets see it move, expecting said beast to wallow and rock all over the place, as is the want of pretty much every engine I've seen on rolling roads like this, more so eight coupled wheels capably of going around a four foot curve. But no such thing it simply purred along with out the slightest trace of body roll or rock, I couldn't even detect if the axles were moving up and down so the 'new' wheels were turned to absolute perfection. Mind if it's weighted like a typical American model then I suspect the table was flexing under each wheel whilst the engine stayed stable.

Two more locos were procured for viewing, one from a large pile of bubble wrap on the floor :rolleyes:
IMG_9868.jpg

The other already on the bench.
IMG_9864.jpg

Neither are perfect and show traits we often associate with American three rail, but the over riding thing about the whole episode was the owners pride and joy in his stock and he really didn't care if they were not perfect.

Finally I cam across the Narrow gauge society and this monster.
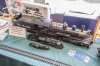
IMG_9872.jpg

I have no idea what scale it is but recall saying out loud "want one" at which point some one promptly told me all it's imperfections, at which point I walked off, I didn't care if it was wrong, I'd still have one despite all of his criticisms. Maybe it's because I'm not clued on on these items that they look so good.

So where is this winding tale leading? It's leading right here. Having spent the last week doing nothing but B1 etches for 16 hours a day and one 31hr over nighter, I'd just about had enough of high fidelity detail work and decided to try and catch something that those at York clearly had.

Several conversations over the York weekend and seeing Daves GP9 as well as a win on Ebay see's a Red Caboose GP9 winging it's way across the ocean shortly but before then and before the etches come back from PPD in a couple of weeks I decided to resurrect the 'pig' and try to put some lipstick on it.

It gets a lot of stick for it's shape or lack of but looking at it I wasn't seeing it and it is a engine I do have a lot of information on, so I decided to sit down and work out exactly what was wrong with it.

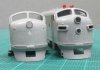
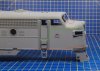
As a reminder this is a photo I took nearly four years ago of the 'pig'
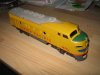
IMG_7911.jpg

Four years in the dark loft hadn't turned the ugly duckling into a swan I'm afraid and to be fair the appalling UP translucent paint scheme wasn't helping see the shape very well at all.

A quick strip down and spray in primer reveals a different view.
IMG_9888.jpg

Primarily we are looking at the nose shape and from this point I have three options.

1: Keep as a F9A and tart up as best possible or try ot convert to a F7A
2: Clean it all up and use it as a basis for an Australian A class (broad gauge though) and procure another shell for the other cab or GM (standard gauge)
3: Total strip down to retain just the cab with a whole new etched shell behind for an Australian CLP, this option might be viable for either of the above as well.

Overall I'm looking for something that'll make me happy and I won't get overly upset if a riveted strap is in the wrong place, i will if i put it there as there's no excuse, but if it's already there then it can stay.

Clearly the 'pig' has issues and is going to need a lot of lipstick to get anything useful from it, but looking at what others have done and re looking at Jordans SOO version (think this was the same shell?) then it's got potential.

So, what is actually wrong with the shell out of the box. I personally thing the overall shape is pretty good, the eye being conned by some particularly loud and incorrect peripherals.

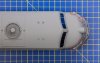
First up are the number boards.
IMG_9880.jpg

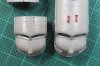
Side on they don't look too bad, but from above and from the front it's clear to see the housing is totally wrong, the sides should be at 90° to the face, not beveled. This is not correctable other than total removal and new ones being fabricated, handy for the Aussie candidates.

Side on
IMG_9881.jpg

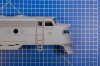
Okay some issue here, the pilot has to go, big hole in the front and looks like it's made from 4" steel plate, an etch here will add fidelity and the remains of the pilot where it joins the body can be rounded off a little more like the real thing. Same applies to the side skirt, too thick so an etch replacement is the way to go....if the chosen model sports it.

Cab door steps, well just wrong shape and size, they are indeed part of a single sheet that goes up and around the cab door, so hand rails off, steps off and new overlay which will also correct the door opening. Cab door window, there's several different versions, some square like this, others with more rounded corners and I'm pretty sure the door is over wide, so the whole door goes and replaced with an etch that suits the panel overlay mentioned above. Finally we come to the biggest elephant in the room, the cab side windows, there's an inset bead around which is on some engines but most don't have this, so the windows need opening out by removing the bead. Once that's done it needs to be made narrower with a thin strip fore and aft to narrow the opening and making it look more like the real thing.

Finally the gutter over the windows, it's way too low and is giving the whole side a compressed look, moving it up to the right location will open out that whole area and change the way it looks.

From the front.
IMG_9886.jpg

Okay those number boards really show up the wrong shape as does the door stuck on, it needs to be flush so that needs coming off and a new opening scribed in or a new etch door in the open or ajar position might be a nice detail. The plough or skirt we've mention before and so we come to the windscreens.

This is where it gets real complicated as there are two sizes of opening, or so it would seem, the model is perhaps a little over large so a thin strip of plasticard around the inside would help, the other issue is the actual opening. Some engines have a hard edge, some are more rounded and over time many have had replacement windscreens. Those with larger openings have glazing just inserted and match the model a little closer, those with smaller openings actually have the larger opening but inside is a secondary fitting with rubber surround, only really visible up close. On the Aussi locos they just bolted a plate inside with the new windscreen framing so easy enough to replicate if going down that road.

So a quick brush montage.
Image3.jpg
Top is clearly the model and the overall shape and rake angles look pretty good but the cab roof to screen radius probably needs opening out; in profile the peak looks a little harsh.

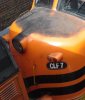
Next up is 1100, not higher gutter, cab door shape and window and side window has insert bead and gutter moving on the model might make it look a better match though it might need narrowing on the rear edge a touch, 1100 also has the larger style windscreen opening matching the model a little closer than others.

2500 is a later model with larger cab door and window, cab side window without inset beading and windscreen with insert framing gives a smaller opening, there are other classes with even larger inset framing giving an almost letter box appearance.

Finally an Australian S class, S312 clearly shows the heritage with it's US cousins, in fact the shells are almost identical, the Australian engines are slightly narrower though the records do not note where or how, but all the cab doors are inset as are the hand rails, the difference is around 50-100 mm which moving the handrails inboard would account for. S312 also has inset windscreen framing giving it the letter box look, only the A class with their rubber beaded inset are smaller. Car body is close to the F unit but in reality might be easier to make a new one.

So taking stock, were do we go with this 'fun' project, given that almost all of the detail has to come off the front from behind the cab door forward, bar the main head light and anti climber ribs then you've an open door to rebuild back to a US F9-unit or go gung ho and have a full rebuild to an Aussi unit.

The A class would require two cabs and virtually everything trimmed back to core skin.
A73a.jpg
New inset windscreens and etched roof hump are easy enough to and new body side grills and paneling are not a great issue.

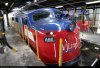
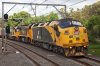
The CLP is a bigger upgrade and they really look good in QR's new colours.
CLP13b.jpg
About the only thing that remains in these rebuilds is the cab, the new body shell being angular lends it's self to etch replacement perfectly and just go to love those skylight portholes! It'd need new recessed cab doors, true of all Aussi engines. Windscreens are the same size as a US engine with standard inset frames, however on these rebuilds they just put a thin plate across the whole front and bolted the new frames in from the inside, the original opening still present inside.

One other trait the Aussi engines do not seem to suffer from, is the slight crease in the nose under the headlight, it's visible on US engines and on some original doors, but many seem to have been built or more truthfully panel beaten over the years that the crease is often hardly visible.

So to bring the tale to an end, the 'pig' is on the bench and I'll run with it for a couple of weeks to see where it ends up, I'm not overly worried about the running frame at the moment, the idea being to just do something very left field, something that when you walk in the room go Oooh but doesn't necessarily step up to the micrometer.

If the project goes down under I'll keep it here under my US headings, they are after all, GM units :cool:

Copyright rests with original owners, images shown for indication purposes only.

MD

 

Steph Dale

Western Thunderer
Good on you Mick; I still wonder at what point you'll throw in the towel on this one.

As you know I don't really have a good word to say about these Atlas/Roco 'shells. It's not a bad thing actually as I'd have probably a dozen of them by now if I thought they were worth the effort. For my money, the shape of the cab windows (all of 'em) is lamentable and the nose flattens out at the front when it should come to a shallow point. I could go on, but won't ;)

What I will say though is that I can understand your enthusiasm - that shell looks a great deal better out of it's factory paint job.

Steph
 

mickoo

Western Thunderer
Dave, yes, most of QR is Cape Gauge but they have recently expanded their operations into standard gauge, initially buying up stock from TOCs who lost the contracts I think. The CLP, CLF and GM are standard gauge, the A is broad gauge.

If the A were standard gauge then none of the above would ever have been written, no brainer in my books.

So I have the choice of simply ignoring the gauge and running it on 32mm gauge or making scale 5' gauge tracks, I think option 1 will win :cool:, besides I now drive all my O gauge stuff on 32 mm gauge ;)

Quite a few classes change gauge depending on seasonal demands and loads but the A class was never one of them as far as I can tell.

Nohab, would love to but their car body is totally different. They're not built in the states or using GM jigs, they all use the jigs and car body design from Nohab in Sweden, it's smaller, narrower and height wise, smaller and more rounded bonnet and larger windscreens. Still the same 567 inside mind :thumbs:

One of my better photos and more memorable train spotting forays.
MY 1159e.JPG

MD
 

mickoo

Western Thunderer
Good on you Mick; I still wonder at what point you'll throw in the towel on this one.

As you know I don't really have a good word to say about these Atlas/Roco 'shells. It's not a bad thing actually as I'd have probably a dozen of them by now if I thought they were worth the effort. For my money, the shape of the cab windows (all of 'em) is lamentable and the nose flattens out at the front when it should come to a shallow point. I could go on, but won't ;)

What I will say though is that I can understand your enthusiasm - that shell looks a great deal better out of it's factory paint job.

Steph
:)) towel? I don't know to be honest, I honestly don't see the issues you see, but maybe that's because I don't want to see them which was the point alluded to above in the York show when 'people' watching. I have Finney7 to catch all of my caring and seeing and detail and crawling all under engines and over drawings, which is not a bad thing as that playground is a world away from this one.
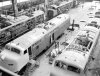
It's not with out the faults and yes how much energy do you expend to make it right, I've not even explored the roof line or fittings, oddly I don't much care :eek: it looks like an F-unit to me and there's so many variants and sub variants with fans and winterization hatches that I doubt I find one to match anyway.

The can windows are not right, I'll concede that and I think they can be made better with a little work and some extra thick rose tinted spectacles :cool: The biggest issue is they are too wide and the corner post isn't thick enough, I don't think it'd make much to give them a better look to be honest but 100% I doubt you'll ever get that in any rendition of this cab.

Nose, well you see I looked and looked and I can't see this peak, it's on the early E unit and very pronounced and I did see it on E8's and E9's and one or two F units, but on the whole, most appear rounded, probably a tighter radius than the rest of the nose. I'm wondering if it was simply where they joined the two cab halves together and simply didn't round it off, rather than a deliberate design trait, mind given the sleek point on the early E's it could well be by design.

Getting rid of the factory paint was well worth it as it distracts the eye terribly; I think once all the moulded handrails, steps, gutters and incorrect number boards go it'll give a better idea of the overall shape. A simple thin temporary plasticard cover over the plough might balance the front end visually better as well.

Anyway, we'll see, it cost virtually nowt and if it all goes Pete tong it can join the rest of the 'old' toys under the bench, those that we fear to discard in case one day we will find a use for them ;) Then I'll just revamp the chassis to go under the Red Caboose GP9 winging it's way over here :thumbs:

MD
 

Overseer

Western Thunderer
Mick,
Happy to help with the locations and dimensions to cut an F7 nose into a VR B, S or A class, or CR GM, CL, or NSWGR 42 etc but don't start with that body. It is too far wrong. Do it as a US F7 or something that requires fewer modifications. The overhead shot of the nose really shows up the problem, it is semi circular instead of the complex elliptical shape in plan it should be which has follow on implications for everything about the nose. I think the P&D Hobbies kit would be a better starting point.

The pressings for the Clyde built noses were imported from EMD so the curves are the same as the F7 but the central puller between the windscreens was narrowed (by 5" I think without the references handy) [EDIT: actually 3"] and the distance from the top of the nose to the body bottom edge is around a foot shorter. In simple terms the loading gauge here is 14' high x 10' wide so enough smaller than US to make a difference.

Any questions re the Australian locos, just ask.
 
Last edited:

mickoo

Western Thunderer
Ok now I see what y'all driving at, I don't have any top down views to visualize though so it's hard to tell if it's elliptical or semi circular.

The drawings I have show the height to be around the same, well the Aussies shorter by 120 mm which I put down to hand rails or such like.

I've scaled the model with the 42 class drawings which are supposed to be pretty good and it gives a sill to roof height of 2925 mm, give or take 10 mm here or there, then I measured the Atlas body and it's 63 mm from sill to roof top. If we scale the real engine by 1:48 we get 61 mm, if we scale by 1:45 (it was made by Roco who are Austrian) it comes out at 65 mm, now by my books and as a rough stand off scale model which is what I'm aiming for, that's reasonably close. Cab roof to bonnet top at base of windscreen is 715mm which scaled out and lets assume 1:48 is 14.8 mm, the model is 15.3 mm.

The cab opening dimensions and any other than can make my life easier would be appreciated to try and work out the viability of the concept.

The rest of the body behind the cab I'm not overly worried about as it's all superficial detail work, it's the core shape that I want to define.

Regarding P&D, a body kit cost $100 with a few cent's change, postage is $25 and import duties is $23 a total of US $148, compared to a the $40 I paid for this model.

I appreciate it isn't right but right now its $148 better than the other options and given the rough scaling outlined above isn't more than a few mm out here and there from the information I've collected here, the overall size is probably close but the shape of the nose may well be out I'll accept.

So, fire away with all the dimensions you can get :thumbs:

MD
 

Overseer

Western Thunderer
If you want broad gauge and unusual there is another option. Clyde built 9 5'6" gauge locos for the North Western Railway in Pakistan in 1955, £1,000,000 paid for by the Australian Government under the Colombo Plan. They were basically Commonwealth Railways GM1 class locos but some bits were simplified/cheapened e.g. less flare to headlight and simplified side grilles. The official photographer nearly had a good view down on the noses.
NWR clyde const.jpg NWR clyde const1.jpg NWR clyde show.jpg NWR Clyde del.jpg
 

mickoo

Western Thunderer
Now that I didn't know :thumbs:

Anyway, apologizes to all as my previous could be construed as a touch dismissive, it's not meant to be. So I'll try again in simpler terms.

My preamble above was supposed to set the scene that some people seem not to care about the finer details and are very happy and co-exist and mix with equally happy people.

I send a lot of time agonizing the details for Finney7, last week over 100 hours worth on the B1 etches and that's just for a Beta build.

I also find I tend to spend more time 'not' doing something because it isn't just so, I'd like to try and see what its like doing something and trying not to be too caring about the minutia. Besides, I have a Red Caboose GP9 coming so will exercise more care and detail on that, like the MP15. Then again neither will come close to the extra detail and research expended on my other etch work.

I am not closed minded about alternative donors or alternate points of view / discussion, but have to balance whether the expenditure will give me a better result that I am happy with. It will have to be significantly better to absolve the pain of the purchase. If I can't make this one look any better or closer to what I want then chances are I won't be able to with the more expensive donor.

I'm not trying to replicate a Faberge egg, close enough is good enough given the legacy issues I'm starting with.

I take on board others, almost certainly more accurate views, but I'm not seeing these issues in such a bad light, maybe I don't care strongly enough about them; what I see with some tweaks I think will make me happy. Even if it is a disaster I'll know where to go and not go next time, I have to start somewhere and this cheap 'pig' is as good a place as any.

The end result is not the primary driving force, it's the doing, if it ends up in the box after two weeks for another four years, so be it.

Back to the original prose, this is what I have (Atlas/Roco F-unit) and this is where I want to go, so here we go :thumbs: where ever that maybe, as it's still a little fluid right now.

All the best

MD
 

Overseer

Western Thunderer
I understand where you are coming from. I do have a bit of a thing for these noses though and have spent a bit of time over the years trying to get one right.

As an example, this is a Kato N scale F7 in the process of being cut down to build a B class. It will give you some idea of the amounts needing to be removed to match the prototypes. B class on left, F7 on right. Kato have achieved the closest to the nose shape in N in my opinion.
B F7 nose top.jpg B F7 nose side.jpg B F7 nose front.jpg B F7 nose top1.jpg B F7 nose axo.jpg
Sorry a few of them are a bit fuzzy. They are 1cm squares on the cutting mat.
 

mickoo

Western Thunderer
They're fine and illustrate the differences as well as capturing the look, though I am a little worried that the width reduction is too much, unless the donor was over wide to begin with?

I've checked all the load gauge profiles I can find and the width is all but the same over car body.
US engines are 9'-10"
Aussie engines are 9'-9"

I can live with the 1" (o.6 mm in 1:48) difference and unless anyone can come up with a definitive or different figure will assume from here on in that the width be satisfactory for purpose. In actuality the Atlas model is 62.0 mm wide (if scaled at 1:48 equates to 9'-9" almost perfectly) which is fine for the Australian models and is as such too narrow for native US engines.

The height is harder to define, most quote height over fittings and not roof line but what I have found is thus.
US engines (FT F2 F7) list 14'-o½" over car body. Over fittings is pointless as it varies with stacks and winter hatches etc.
Aussie A 13'-8" over fittings
Aussie B 13'-8" over fittings
Aussie S 13'-6½" over fittings
And importantly the B class also list over car body as 13'-6"

Clearly the Colonials are of shorter stature and the (nominal) value of 6-9" seems plausible which ties in roughly with the quick scaling I did last night on the 42 class drawings. I'd like to nail the height a bit tighter if possible but will work with 9" until further information presents it's self.

So, the pig needs a shave and to go on a diet, this I can do :thumbs:

Next the nose profile, yes it's not perfect and the models above show a distinct slope to the bonnet top, the Atlas model has one but is roughly half the required angle, it's not beating me up right now so I'm happy to let it be for the time being.

Further, after looking for what is far longer than is healthy I cannot find any evidence of a crease or point on any Colonial Clyde built engines, if it's there it's all but invisible unless you use a set of french curve templates on the real engine. That does not mean that there may not be engines with a crease at some point, just that I cannot find such evidence.

Some of these are crops of copyright images so are here to illustrate the point, others copyright is as shown.
A62_2.jpg

A78h.jpg

CLP13d.jpg

gm44_06.jpg

Image4.jpg

Image5.jpg

In addition, a very very kind gent PM'd me last night with a set of nose profile patterns for the F3, they are of course copyright so I've traced over them in Autocad and we have thus

Image2.jpg

In the plan, which is at footplate level we see no noticeable crease, the side profile is from the section 13" off centre line, I.E just to one side of the headlight. Currently these profiles are drying on some stock card and will be cut out shortly and offered up to the model. I already know the side profile will conflict with the model as the bonnet top slope is greater than the Atlas nose and matches more like that on Overseer's models.

The evidence against the crease continues to stack up with the US engines, again crops of images for indicative purposes only.
B&O 4472a.jpg

UP 0515 F9A.jpg

SP 0355.jpg

The last two being logical choices for a US engine, the UP one being the closest match to the Atlas F9 and being the one the model is supposed to represent. both clearly show the correct shaped number boards and the windows are a defacto alteration anyway.

So the evidence clearly shows no or virtually no crease in the nose......however, along with the nose profiles in the PM last night there was a detail of the number board added to RI and ATSF engines, whilst the drawing details the board and fixings it does without any doubt clearly show a creased car body shell behind and by fortune I'd picked up some good detail ATSF images the other day.

ATSF 0215 F7A.jpg

You can clearly see where the number board was positioned below the head light and more importantly the visual crease in the car body, it's more defined in the door panel to be honest but there is a crease and this is confirmed when looking at other ATSF engines, but only those with number boards and no second headlight in the door, those engines have rounded fronts.

Mind the base below the door does look like a uniform curve to be honest but it is clear, some engines have a distinctive crease, however it is not a uniform application across F units, there being more examples of smooth fronts that creased fronts from the photos I've looked at.

The next step is to carefully cut the profiles out and offer them up to the shell and post photos and make a decision on the best way forward....back shortly.

MD
 

Overseer

Western Thunderer
Good to get the F3 profiles. I will have to find my note books with the dimensions, or I should get a chance to measure one in the next week or so to confirm. From memory the Kato model is quite accurate and the cut down one is scale width, but then again they are 1:160 scale so are small.

Not sure if you remembered the profile phot of A71 in post 40 of my Oddments thread, might be a some use.

On the crease issue, best to use photos and model what each loco had. They were pretty much hand built so did vary. Some of the B class had a more pronounced crease lengthways on top of the nose than others depending on the workmanship when welding the two cut down pressings. The roofs of the Australian locos also have a sharper radius at the centre to match in with the section removed from the windscreen centre pillar, instead of the continuous curve on the US locos. It is not obvious but it is there.

Another thing to note is the headlight surround, the B class one was slightly smaller than the S class one, which became noticeable when twin sealed beam headlights were installed - they don't really fit in the B class. Not sure about the others.

Watching progress with interest.
 

mickoo

Western Thunderer
Right the results are in, some good, some bad and some really bad.

First the side profile which i figured was a lost cause so just did a cursory check.
IMG_9899.jpg

Surprisingly it's quite a close match and I'd be happy with that profile as a general ball park area.

That's the good, now the bad, the footplate profile, which I had considered was ok.
IMG_9903.jpg

Mmm not clever and I understand the 'flat' comments made by others now, it's not that noticeable until you actually compare it with something, but once you do you see it all the time.

IMG_9911.jpg

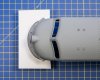
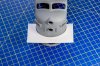
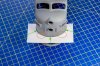
It's not a complete disaster, the gap at the front only being 1.0 mm and the gap at the sides being about 0.75 mm. We have two options, ignore it or tweak it.
IMG_9911a.jpg

Being as all of the raised detail has to come off anyway it won't take much to remove a little extra in the red areas to ease out the curve and get a closer match, it won't be perfect but it'll be a smaller elephant in the room. The only problem with that is the anti climber and thus the fairing underneath, they will still be to the old profile. If modeling the US then it'd be a bit of an ache but for down under I need to hack this area anyway as the anti climbers and lack of centre buffer all need altering, if modeling the CLP a lot of the lower skirt is cut away for steps and new ditch lights.

In short leave it and life with it or take the whole front end back and chop for a the new Aussie profile which isn't a massive deal, a new anti climber can be etched up as an overlay anyway.

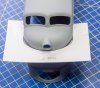
Finally we get to the F level where the down right obnoxious and ugly rears it's head.
IMG_9912.jpg

Clearly it's along way out around the number boards, so much so that I do question the profile, I accept it's out but that much I find hard to reconcile and I'm not seeing such a hard radius bulge around the number boards on real engines. Even so, if we accept a huge concilatory 50% error it's still a big hairy Mammoth in the room.

Interestingly when you mirror the profile you do get a slight impression of the crease under the head light.
IMG_9914.jpg

At this point we have only two options, ignore it, or send the pig back to the sty for another four years; or to the butchers and pick up the bacon and honey roast ham later. A possible third option would be the P&D shell route but I've no assurances it'll be $148 worth of perfection and if going the Colonial route a lot of $ to then cut up.

At this point there is probably quite a few people going 'told you so' ;) well, I consider myself well and truly told :thumbs: They are probably now also saying run a mile or do something more productive and on balance they are probably right.

However, that does not get me an F-unit (Colonial or State side) it also places me in the bracket of the man at York who would not have the giant D&RGW narrow gauge model because it was not just so and that's a morale position I do not want to share; it also means I have failed to have fun and accept the model faults and all.

If we move on and accept the model for it's faults, which we shall, what do we need to do to tweak it.

The easiest is to keep it state side and simply remove the raised bits that are wrong, headboards, front door, grab irons and cab door areas and then work from there. If we take away the templates we have no reference of the shape errors, sand, head, in! But it's still a fair bit of work and there is always P&D to re consider.

Going Colonial is more exciting and if the whole lot bar the headlight has to come off the front then why not indeed. I will have to accept that level F is never going to be right so that template is on the fire. At footplate level there is the choice of correcting or tweaking and then reworking the anti climber area but that depends on which prototype engine to model; most require some sort of reworking anyway.

I'm happy to accept the width as is and taking on board Overseers points on the church window effect on the roof am happy to proceed anyway. The CLP has a whole new flat roof all bar a few inches above the windscreen so it's not an issue there, the GM has a stock roof so the change in radius would be noticeable and the A class have a new raised flat humped section over the machinery spaces so only the cab roofs would be an issue.

The height needs looking at, Overseer cleverly cut what looks like a dog leg pattern to retain the steps and other raised features when chop shopping his nose (in green)
Image6.jpg

I have no intention of being so polite, for me it'll be easier to just take the required depth off the whole base, cut and recover the anti climber area and re affix in the new position. All of the door area surface detail has to basically go as the whole section from sill to cant rail is inset, on the A class it has beveled edges, on the CLP/CLF straight cut square edges.

Behind the cab is open season as none of it is worth salvaging, an a unit will require at least another cab to tack on the end, a CLP won't.

One final point about the Colonials, they don't tend to model in 1:48 as far as I know, in which case this project is in the majority of 1 and if we use the 'correct' scale, means that this body as a donor is not even slightly fit for purpose :eek:

So, out with the knives and files and lets begin chopping bits off and smoothing the shell down, certainly ahead of the cab rear bulkhead.

MD
 
Last edited:

Brian McKenzie

Western Thunderer
One final point about the Colonials, they don't tend to model in 1:48 as far as I know,

There is a real divide in Australia - which they seem happily resigned to:
Modellers of Victorian Railways use 1:48 scale to better represent their 5' 3" gauge system on 32mm gauge track,
whereas over the border in New South Wales it's all 7mm scale territory for 4' 8-1/2" gauge.

At which point might the curvaceous nose panels of later model F type units been made from pressings? I've read somewhere that the nose panels for earlier models were hand beaten and displayed variation as a consequence.

-Brian
 

Jordan or Plymouth Mad

Mid-Western Thunderer
Sorry I'm a bit late to this F-Unit Ball, but to be fair there's quite a bit to read through!!

I can sum up my general modelling feelings with this:-
Neither are perfect and show traits we often associate with American three rail, but the over riding thing about the whole episode was the owners pride and joy in his stock and he really didn't care if they were not perfect.
To be honest that's my position too. If I was to worry too much about every last little detail (& even some major ones) I'd never get anything done, and more to the point not have any fun, which is surely the whole point of a hobby in the first place?
I'm reminded of a situation I found myself in after just a few years in the hobby when I started to super-detail my BR 4mm diesels. They were all in bits for ages, and although they eventually looked good with scale couplings and bufferbeam pipes etc, then they couldn't pull trains round average layout curves. A mate of mine had a layout that was pretty basic, but his Deltics, although not as detailed as mine, could pull coaches and hammer around that layout like they were on the ECML, and operating was fun, despite the basic scenery and so forth. It was a lesson for me in compromise that I never forgot. When I'm watching a layout, be it my own or at a Show, however accurate the models are, I am never deluded for an instant into thinking I am watching the real thing.

For my Atlas/Roco F-Units, the FP7 came ready-done; spliced from two F9s quite expertly by person unknown. The main concern I had when making my other F9 into an F7 was the position of the one body-side porthole, and louvres. I left the side valances which aren't correct, but as they hold the body on, I live with them.
They look like F-Units to me, and are as detailed and accurate as I need them to be, except....
One thing you can put me down for please, Mick, is a couple of new pilot etches, as yes the big coupler gap does bother me, but I have yet to bother tackling it. Once that was changed, I'd likely add coupler cut bars and an air brake pipe. Soo Fs didn't have MU pipes on the nose, so couldn't go in the middle of a lash-up - happily, of course, this meant that very often they were the Lead Engine :) and I don't have to fit all those pipes!!

Anyway, just my 2p...
 
Top