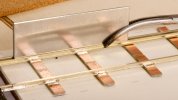
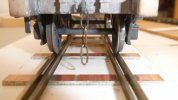
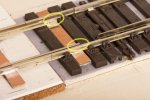
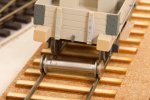
7mm Heybridge Basin

Richard Gawler

Western Thunderer
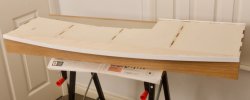
With this in mind, and to match the pine edge mouldings have you used, have you considered using iron-on wood veneers for the fronts, outer ends, and rear of the baseboards to hide the ugly burnt (to me anyway) laser cut joints to finish the outer edges?

DSC_6182.jpeg

Truly I have never encountered a woodworking product which is so easy to use and which produces such a dramatic effect. The veneer is easier and quicker than paint, and about the same price if you have to buy fresh undercoat and gloss.

So far I have put veneers on only the outsides of the baseboard sides, and now I am reading up on balancing veneers. Which, like outside veneers, I have never used before.

I wonder, should I be adding some more veneer as patches between the cross members on the insides? Or perhaps put some stripwood along the unsupported bottom edges, or even simply prime the inside faces with dilute PVA? The internal structure is still as it was a few weeks ago, post 59.

It would be a shame if the sides start to warp after changes in humidity.

- -

Addendum 08:36: I have decided to try for extra veneers on the inside. I have no experience of this but many woodworking forums talk about the need for a backing veneer.
 
Last edited:

jonte

Western Thunderer
And I can confirm that the Red Lion is still going strong. The Parade is very popular in most weather, ice cream and chip sales seem to remain buoyant.

John
As an aside, and further to your post, John, re Parkgate and its rare ‘high-tides’, may I share the following with you ? Simon (@simond ) might be interested too.

It stems from our party’s time as holders of several slots at Heswall boat yard. To give you a flavour of the place, think League of Gentlemen :rolleyes:

Anyway, there was a long held belief with elements of the fraternity there, that ‘the Welsh had stolen the water’(I kid you not) and hence the cause of the drying-up in the upper reaches of the Dee on the Wirral side.
I chuckled, along with the rest of us, when one ‘incumbent’ suggested organising a working party of a dozen or so of us, armed with shovels and, yes, dynamite(!) to blow a section of the Dee at low tide at its edge (somewhere towards Flintshire, a particular spot this guy had identified after giving it much thought :confused:). It would have to be a Spring to get far enough out towards the Welsh side, but what about getting back, was a passing idle thought that crossed my mind as his lips moved. We chuckled once more, but he was serious; as were his cohort……. And this guy was an academic, the son of an Oxford Don. I suppose reason sometimes has to make way for extra intelligence. Strewth!

Apologies, Richard, for the aside.

Jon
 

simond

Western Thunderer
Thanks Jon,

I was a regular at WKSC for many years with dinghies in the Marine Lake followed by tidal cruisers which raced on handicap, alongside the Hilbres and Stars, on which I occasionally crewed.

I don’t recall having much to do with the Heswall mob apart from an occasional invitation race. And iirc, there was a decent fleet of fast catamarans at Heswall? It’s forty years or more ago, it’s getting a tad hazy!

atb
Simon
 
Last edited:

jonte

Western Thunderer
Thank Jon,

I was a regular at WKSC for many years with dinghies in the Marine Lake followed by tidal cruisers which raced on handicap, alongside the Hilbres and Stars, on which I occasionally crewed.

I don’t recall having much to do with the Heswall mob apart from an occasional invitation race. And iirc, there was a decent fleet of fast catamarans at Heswall? It’s forty years or more ago, it’s getting a tad hazy!

atb
Simon
Top club WKSC, Simon.

The Heswall lot as you knew it, I’m guessing, would have been the Dee Sailing Club, which migrated from Heswall to Thurstaston many moons ago now.

Their premises became a restaurant in latter years (Sheldrakes) although I believe it’s now closed, with boats held in the yard adjacent, which became a private boat yard.

Incidentally, with mention of HODs, have you seen the grounded one on Parkside front sporting a flower bed? Such a shame.

Jon
 

oldravendale

Western Thunderer
So far I have put veneers on only the outsides of the baseboard sides, and now I am reading up on balancing veneers. Which, like outside veneers, I have never used before.

I wonder, should I be adding some more veneer as patches between the cross members on the insides? Or perhaps put some stripwood along the unsupported bottom edges, or even simply prime the inside faces with dilute PVA? The internal structure is still as it was a few weeks ago, post 59.

It would be a shame if the sides start to warp after changes in humidity.

- -

Addendum 08:36: I have decided to try for extra veneers on the inside. I have no experience of this but many woodworking forums talk about the need for a backing veneer.
Now you mention it (and I'd forgotten until your post) it has always been good practice to veneer both sides of any boards. I did quite a bit of marquetry until about 20 years ago and boards were always veneered both sides. I don't know whether that'd really be necessary in your case but better safe than sorry, I reckon.

Brian
 

jonte

Western Thunderer
Sorry, Mike, I’ve only just noticed your post.

Never say never, Mike, but my interest in the main is in the smaller scales, although I still own the odd seven milli item :)

Many thanks in any case for kindly offering me the opportunity :thumbs:

Jon
 

Richard Gawler

Western Thunderer
Now you mention it (and I'd forgotten until your post) it has always been good practice to veneer both sides of any boards. I did quite a bit of marquetry until about 20 years ago and boards were always veneered both sides. I don't know whether that'd really be necessary in your case but better safe than sorry, I reckon.
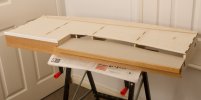
Yes, better safe than sorry. I have put some patches of balancing veneers on the insides.

DSC_6209.jpeg
If I was building this from scratch, I would still take the same approach (and not apply the veneers before assembly) because the veneers hide the heads of the pins and indeed a few places where pins emerged from the sides of the boards :rolleyes:

DSC_6212.jpeg
This is the viewing side at home. The fiddle yard goes on the right, and its traverser slides out into the room.

DSC_6213.jpeg
The idea for the front is make the "water" as a three-sided box with a clear acrylic top and clear acrylic sides. The top will be just below the baseboard top, about two scale feet below the nearest rail head.

I’d suggest glass. The swans would otherwise wear tracks in the acrylic which will not be easy to hide.

not favouring the horse, as it would make waves. I guess the swans would also, but the horse…
I have pondered glass and I bought a secondhand picture frame to experiment but the material seems too fragile and even dangerous for a portable model. Thicker glass is stronger but too thick for Magnorail. I have heard of people using a thin film of H2O in Magnorail water scenes, and the swans (but not a horse) are still in the back of my mind. Might be worth some experiments but if I start this now the tracklaying might be next year . . .

So . . . I guess I have two chances with the design here. Either some dark paint on the white strips will frame the body of the layout while the basin appears to flow over the front edge (this might really happen with the water idea!) . . . or viewers will ask "why didn't you carry the dark edge along the front of the water?" I can only do my best, but the design of presentation is something I want to try. Goodness knows what the lighting rig will look like.
 
Tracklaying

Richard Gawler

Western Thunderer
The first turnout is now glued down forever . . .

DSC_0674 (1).jpg
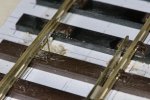
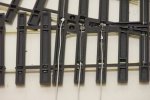
Unfortuately, the tiebar using piano wire and two offcuts of copper clad (September 2022), which I thought was really neat, broke before the turnout reached a baseboard. So I am having a first attempt at an under-baseboard tiebar.

DSC_6227.jpeg
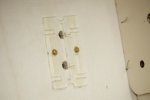
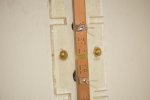
The new tiebar assembly is from C&L. I have glued its acrylic base onto the baseboard with Evo-Stik contact adhesive.

DSC_6231.jpeg
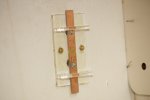
The tiebar assembly uses two vertical lengths of 0.5 mm piano wire to move the point blades. So there is space to model a scale tiebar.

DSC_6228.jpeg
I had a go at arranging these wires to pivot on the tiebar to reduce torsional stresses but this merely increased their lateral movement and the associated stresses at the blades, and I ended up with too much slop.

DSC_6234.jpeg
So they are now soldered solid. This assembly "seems to work" but I have doubts about the longevity of the link wires. The blades are code 124, but on the bright side they are planed along most of their lengths and they are longer than a similar geometry in 4 mm scale.

DSC_6240.jpeg
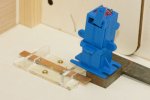
If the tiebar had been an inch longer I could put a stall motor or a switch mechanism directly beside it. I will have to extend the tiebar or arrange some kind of linkage.
 
Last edited:

simond

Western Thunderer
I rather like the droppers off the blades idea. It gives a decent length for them to flex, so I don't think I'd worry about torsion.

A short length of brass wire with a loop at one end for the Tortoise spring wire, and soldered at the other to your tie bar should do the trick.

atb
Simon
 

Richard Gawler

Western Thunderer
A short length of brass wire with a loop at one end for the Tortoise spring wire, and soldered at the other to your tie bar should do the trick.
Yes, but later. It is best for me to lay some more track. Then I can lock the blades and try running trains; and sort out both point mechanisms together.

DSC_6243.jpeg
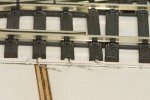
Next up is the Setrack point. I have put my dropper wires inside the hollow timbers.

DSC_6249.jpeg
They will disappear under the adjacent roadbed and the ballast.

DSC_6253.jpeg
This particular Setrack point came with a slight skew on its straight stock rail, and this was in exactly the right place to make the transition to 31.5 mm gauge cool.png

DSC_6260.jpeg
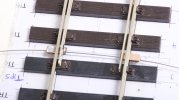
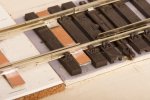
I have cut off the insides of the two chairs nearest the camera and regauged the track to suit. The 0.5 mm gap between rail and chair will eventually disappear under the ground surface.

DSC_6259.jpeg
The inset track is Peco code 124 "FB BH" rail with their code 100 FB rail set 1.5 mm inside. My fold-up gauges are giving me 31.4 mm gauge, so with 0.1 mm to play with on the 0-MF standard and acknowledging the risk of being banned for life from any discussions of building track, I've set both inner rails from their adjacent running rails. Not a check gauge in sight.

P1050750.jpeg
Easy peasy, though a mate's Heljan class 40 may be interesting.

I've used code 100 inside rails because this helps to keep track cleaning off the scenic surface between the running rails. Using Peco instead of Kalgarin rail gives me the maximum contrast between the widths of the rail heads.
 
Last edited:

Yorkshire Dave

Western Thunderer
I have cut off the insides of the two chairs nearest the camera and regauged the track to suit. The 0.5 mm gap between rail and chair will eventually disappear under the ground surface.

As there's a short distance between the toe of the point and the check rails for the inset track personally I'd have turned the ends of the check rails in slightly to assist the wheels to be guided in rather than possibly have the wheel flanges clouting the ends.

cyy9uhgb.jpg
 

Richard Gawler

Western Thunderer
A good point, and something I hadn't thought of. I have pushed some rolling stock along the track, by propelling it from the buffers (as a loco would) and by pressing the vehicle's wheels sideways against each stock rail and point blade in turn.
  • The flange of the leading outside wheel of my Dapol Stroudley coach, 29.0 mm B2B and 115 mm wheelbase, just about touches the end of the rail nearest the camera when approaching from the curved leg of the Setrack point.
  • All other samples of stock I have tried always clear the ends of both inner rails. Wheelbases range from 120 mm to 33 mm, and the B2Bs are 28.9 mm for Minerva RTR, 29.0 mm for Dapol RTR and 29.2 mm for models with Slater's wheels.
  • Approaching from the straight leg, wheel flanges on my samples of stock cannot hit either rail end. The B2B would have to be less than 28.9 mm - I'm not sure how much less. Coarser wheels would collide but such stock would probably derail on the A6 turnout and wouldn't get this far.
I can probably live with the Dapol coach fouling because it shouldn't be going into the kick-back siding served by the curved leg of the Setrack point. Arguably, my diorama cum test track has gained an unplanned feature: it can detect badly-set B2Bs.
 

Richard Gawler

Western Thunderer
My three locos which can get round a Setrack curve all run through here without difficulty. This includes my Minerva K class which has its B2Bs all over the place at 28.9, 29.0 and 29.1 mm. So does my Connoisseur saloon coach (29.2 mm), and this has a wheelbase 13 mm longer than the Dapol Stroudley coach.

It seems impossible to adjust the B2Bs of the Dapol Stroudley coach (to get them to meet the 29.2 mm standard!) so I have taken a needle file to the track. I've taken a smidgen off the tip of the rail nearest to the curved stock rail and the problem has gone away. The contact of the flange was always more of a light kiss than a collision, but now there is no contact at all.
 

Yorkshire Dave

Western Thunderer
I've taken a smidgen off the tip of the rail nearest to the curved stock rail and the problem has gone away. The contact of the flange was always more of a light kiss than a collision, but now there is no contact at all.

Even if it was a light kiss at least the action of removing a smidge from the rail will eliminate the annoying 'tick' and or slight kick which would have developed every time you ran the coach over that section.
 

Richard Gawler

Western Thunderer
The distance across the inner rails of my inset track measures just below 28.6 mm; so an easy working clearance for a Minerva wagon with 28.8 mm B2B on a straight track.

So I am thinking, 0-MF was a sensible choice for me. But if I had set my heart on 0-SF, which tightens things up even more over 0-F, my Slater's wheels would probably have been okay but some some RTR wheels would have come to grief.

As it is, I've put a RTR coach, a Setrack point and some 0-MF pretty close together (the inner rails extend inside the base of the point), and found the limits of what to expect. Good; this is probably tighter than anything else I will want to build in 0 gauge.
 

Richard Gawler

Western Thunderer
Nevertheless, our hobby is an inclusive one and I want to use this diorama as a photographic background. Therefore I will try to set the gauge of the hand built FB track past the passenger platform (marked 0-MF on the plan) as wide as I can, up to a maximum of 33 mm.

From the sublime (GWR 517 class and a couple of wagons) to the ridiculus something longer (class 37/4 plus four Mk.1s), just how long is the piece of track?

With our diverse interests we ought to have something to fit!

regards, Graham

Standard OF will fit (of course!)


View attachment 189099

And won't obviously fall in
View attachment 189101

apologies for the crude rail section to the S7 crowd, (if I'd had a few minutes more I'd have done Hornby tinplate rails to S7 standards :) )

For the record, I set my vernier caliper to what it claims to be 33.00 mm, and my wheels from Slaters, Dapol and Minerva will all stay outside this gap and not pass through it.

A brief moment of gloom now follows. Sometimes theory and practice don't quite match up, and in the face of what I thought was a decent objective I bring bad news.

DSC_6274.jpeg
These are Slater's kit wheels; my RTR wheels from Dapol on Minerva have smaller B2Bs and so they fall in even more easily.

I am so sorry, especially to Graham because I truly thought this was a chance to make the layout inclusive if in a limited way. Thanks to Tim (@Tim Humphreys ex Mudhen) who lent me his 33 mm gauges. At least I checked before I fixed the rails down :(
 
Top