7mm Rob's Rolling Stock Workbench

Steph Dale

Western Thunderer
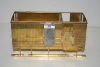
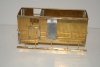
After discovering the different handrails, a pleasant couple of hours was spent over the last couple of nights creating these - I finished them too late to post last night.

Tonights task is to put them on the van I hope.....
Nice little touch that - like it...!

Steph
 

Rob Pulham

Western Thunderer
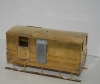
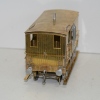
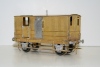
A busy couple of days ultimately meant that I didn't get the handrails fitted on Thursday night, despite my best intentions.

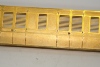
Today has seen them and the additional lower handrails added.

NBRBrakeVan003-1.jpg

NBRBrakeVan002.jpg

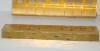
Although I haven't taken a photo yet, Thursday did see the rain strips fitted to the roof.

Jim's instructions have you using 0.7mm round brass rod. However I found a short length of 0.8mm square nickel rod in my stash which was just long enough to do the two rainstrips.

I ran them through my rolling bars to get the curves even while matching the dimensions quoted by Jim.
 

Rob Pulham

Western Thunderer
What an interesting and enjoyable build this is turning out to be.

While researching in Tatlow and reviewing a drawing supplied by Graham, I picked up that up to 1931 these vans had quite prominent sanding gear. Having resized the drawing to 7mm scale and taken dimensions for the sand boxes from it I deduced that the ones in the veranda compartment would be visible when viewed from normal model railway viewing angles - above and to either side.

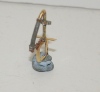
So I gathered some bit's of scrap etch from the turntable and made a couple. I made the hinges and soldered them onto the lid using the microflame. I had just nicely got to soldering the lid onto the box using sprung tweezers as clamps, when it all sprung apart and one of the hinges disappeared into thin air....

An hour later when I had made up a new one and the boxes were fitted to the floor, my good lady found the one lost in space.

NBRBrakeVan011-1.jpg

NBRBrakeVan004-1.jpg

NBRBrakeVan002-1.jpg

NBRBrakeVan012-1.jpg

NBRBrakeVan007-1.jpg

NBRBrakeVan006-1.jpg

I also beefed up the brake yokes. The photo's that I am working from show the main cross bar of the yoke to be quite substantial so once again scrap etch to the rescue. That was done after this set of photos was taken so they will probably be on when I show pictures of them.
 

Rob Pulham

Western Thunderer
Thanks Rob,
It's funny that you mention soldering. I had a conversation with Graham this morning and during it I mentioned that when I started kit building there were three things that I regarded as"black arts" soldering, rolling boilers/roofs and weathering.

Now I have successfully done the first two, I think that as much of it is other's fear transferring itself to me than the problem in the first place - rolling boilers accurately in my experience has more to do with having accurate sized piece of metal in the first place than the actual rolling.

Soldering, like all jobs is much easier with the right solder and flux and an iron that retains it's heat. Once you have mastered the basics then you find what works best for you.

These days I use one flux for everything (Simon Varnham's Building O Gauge online) and I have a full range of solder starting at 70, and going through 100, 145, 187, 227, right up to 298 I also have some electrical solder which I use for soldering wires/pickup's etc.
I do as much as I can with the microflame which makes cleaning up virtually none existent but for the rest I have a good scraper...... I also try to use as little solder as possible and apply the flux via a syringe so it goes where I want it.

Now I just need to master the black art of weathering, although as long as I have Chris who is willing and able to do it for me I have no urgency to master my fear of that one.:rolleyes:
 

Rob Pulham

Western Thunderer
A couple of hours yesterday saw the brake van complete (or as complete as I plan to make it). I deviated from Jim's build methods by using some WEP compensation units, although I have fitted other vehicles exactly as Jim suggests without issue before.

I rolled some microbore tube in my rolling bars to ensure that all four sand pipes were to the same profile and then made the distinctive safety loops for the brake yokes from fine scrap etch. Besides painting the only things to complete are the springing of the coupling hooks/buffers.

NBRBrakeVan001.jpg

NBRBrakeVan002-2.jpg

NBRBrakeVan003-2.jpg

NBRBrakeVan004-2.jpg

NBRBrakeVan005-1.jpg

NBRBrakeVan006-2.jpg

As with the other Connoisseur wagons that I have built, this was a joy to put together even if you don't want to add any additional details.
 

AdamF

Western Thunderer
Looking fantastic Rob :thumbs: The handrail work is especially impressive. Can't wait to see it painted and weathered!
 

Rob Pulham

Western Thunderer
Continuing on the NBR theme I put this together once I had finished the brake van.

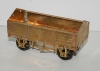
It's a Majestic Models NBR/LNER Floor Cloth Wagon. aside from the etched strapping strips it only consisted of about a dozen individual parts so it went together in no time at all. In the absence of any detailed information on this I built it straight from the box with little deviation from the instructions.

FloorClothWagon001.jpg

FloorClothWagon002.jpg

FloorClothWagon003.jpg

FloorClothWagon004.jpg

FloorClothWagon005.jpg

What I need, if anyone can provide the answer is the placement of the lettering pre 1937. George Dawson had struggled to find this information and had guessed at post 1937 livery (according to his notes with the kit).
 

Rob Pulham

Western Thunderer
Since finishing the Floor Cloth Wagon and still being on holiday I haven't rested on my laurells. Next up on the workbench is another of last year's Christmas gifts, a Connoisseur Diagram 416 Midland Milk Van.

For once Jim seems to have provided more in the way of details than is necessary for this diagram of van.

He provides torpedo vents for the roof and their positions but referring to Midlad Carriages an illustrated review by Jenkinson ad Essery reveals: "However, in 1904, the MR decided to fit many of its fruit and milk vans with torpedo ventilators to improve matters. We have no evidence that any of D416 were so treated"

The accompanying photo is the same photo that is included in Jim's instructions along with the drawing. Jim also provides a more detailed approx 7mm scale drawing. Both of these drawings show long handles for one of each pair of doors and there are etched T handles provided for the left hand doors.

The photo however only shows ring type handles on the left hand doors and by good fortune I had some nice Griffin castings in stock for these.

I am not sure whether the safety chains would have been removed by LMS days but I like them so I have added them. I opened out the holes in some short handrail knobs and soldered the chain into them before adding the hooks and soldering them to the ends.

Jim's Midland buffer castings are very nice but I don't particularly like the way that he offers to spring them so I raided the spares box and came up with some turned heads and modified them into "normal" sprung buffers.

ConnoisseurMRMilkVan005_zps6440fc2a.jpg

This is where I got to just as the New Year chimed last night.

ConnoisseurMRMilkVan003_zps35c9971c.jpg

ConnoisseurMRMilkVan004_zpsd409e79e.jpg

ConnoisseurMRMilkVan006_zps201b2945.jpg

ConnoisseurMRMilkVan007_zps6b8e1f10.jpg

ConnoisseurMRMilkVan002_zpsc41dcf7a.jpg

ConnoisseurMRMilkVan001_zpsab97a2f0.jpg

ConnoisseurMRMilkVan001_zps1d0d8b56.jpg

ConnoisseurMRMilkVan002_zpscba0daa3.jpg

ConnoisseurMRMilkVan003_zpsbabf18b6.jpg

ConnoisseurMRMilkVan005_zps7d44f6c7.jpg
 

Rob Pulham

Western Thunderer
Work on this slowed down as I went away for a couple of days at the New Year. A visit to the NRM at Shildon allowed me to see work on the A4 Dominion of Canada which is being cosmetically restored there to garter blue including both side skirts and the bell.

Since returning I have cracked on and finished the milk van ready for painting.

As I got to the final details I was looking at the cast whitemetal vacuum pipes and thinking that they would be quite vulnerable so I got some 1.5mm brass rod a few bits of scrap etch and some 24 gauge brass wire and made up these as replacements

ConnoisseurMRMilkVan001_zps154af8c8.jpg

ConnoisseurMRMilkVan002_zpsca853cdf.jpg

In terms of time spent I could probably have bought some cast lost wax ones cheaper but I did enjoy fiddling about with them and I am pleased with the result.

These are a few shots of the van with the remaing details added. As I did with the brake van I beefed up the brakes with scrap etch to make them a bit stronger.

ConnoisseurMRMilkVan001_zpsca9cb8d9.jpg

ConnoisseurMRMilkVan002_zps6f93bedb.jpg

ConnoisseurMRMilkVan003_zps2b349f8c.jpg

ConnoisseurMRMilkVan004_zpsb5af50f8.jpg

ConnoisseurMRMilkVan005_zps45cb0366.jpg

ConnoisseurMRMilkVan006_zpsc144d32b.jpg
 

Rob Pulham

Western Thunderer
Next up is another one of Jim's goodies this one the GER/LNER Sand Wagon. This is the only kit of Jim's that I have built so far that has compensation built in.

I built it straight from the instructions, the only change being that I only added brake gear on one side. Parts are provided for both sides.

Having looked in volume one of LNER wagons at the couple of photo's in there, I couldn't make out a second set of brake gear.

GERSandWagon001_zpse68031e9.jpg

GERSandWagon002_zpsd7b30231.jpg

GERSandWagon003_zpsfca0f0aa.jpg

GERSandWagon006_zps23005192.jpg

GERSandWagon007_zpsb2660eac.jpg

GERSandWagon004_zps5650d11c.jpg

GERSandWagon005_zps933514d4.jpg

Next on the workbench is a Welcome Wagons BR Pipe wagon.

I am building this to sell - Sadly I didn't read the description too well when I bought it, homing in on the LMS design rather than when they were built. So it's a bit late for the period that I model.
 

Buckjumper

Flying Squad
Nice sand wagon :thumbs: The only mistake Jim made was the rectangular builder's plate - but I fitted it in error too! A wagon of that age would have had the pair of oval plates, but by your period one or even both would have been removed from a departmental wagon.

IIRC the brakes are OK for departmental wagons for your period.
 
Top