SimonD’s workbench

timbowales

Western Thunderer
as I simply cannot withstand a distraction, and have the attention span of a goldfish...

View attachment 237693

drawn from the real thing. A BR(S) loco (?) rear lamp

View attachment 237694

It's currently modelled full size, which might be an issue for the printer... I shall prepare & post an 7mm STL file at some point, but for some reason SW is being a git, and won't scale properly.

Hopefully sorted in the morning.
Ah, the electrons always know when to be uncooperative
 

simond

Western Thunderer
Some quite small, but rather expensive, springs. £60 per 100…

image.jpg

and a couple of wagon kits

a little fettling will be needed to get the axleguards to fit nicely, they’re very close, but need easing. The v-bracket and brakes fit.

I broke one brake lever getting it off the supports.

the body looks fine.

The brake guard/rack was not well-enough supported and I’ll need to do them again. Inevitably, it’s the bit I forgot on the last print, and it’s the only bit that is no good at all. Ho hum.

I’ll not get it assembled tonight, but I might just check the springs.

image.jpg

The body sheets are a bit over scale thickness, but everything else is there or thereabouts, which is why you can almost see through some of the bits. It’s delightfully delicate.

Brake guards...

image.jpg

So close…

Axleguard assy with axlebox and spring

image.jpg

Bumpstops

image.jpg
 

simond

Western Thunderer
“Unbelievable!”, as Victor Meldrew would say, I’ve run out of cyano! I did have an unopened bottle of Loctite, but it has set hard, so that’s in the bin, and I’m off to Screwfix to get some more.


But, the wagon can be assembled “dry”, so I did. I think a little tweaking is required, to reduce the spring preload, but with weights to get the wagon to ~ 100g it is just sitting on the springs. I need the spring pockets to be maybe 0.5 - 0.8mm deeper so they are floating.

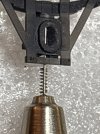
Not a million miles out on the buffer height gauge anyway.

image.jpg

RH one is the one I did last week, with Slaters 7164 springs, and 65g of lead. LH one is yesterday‘s print, the Springmaster springs, and the 96g weight. It’s sitting about half a mm too high, suggests the bearings are at full droop, not floating, but it’s really very close.

the unweighted wagon with floor, wheels, buffers, couplings, etc., comes in at about 38g.

I need to fix the brake rack, and make the axleguards a slightly easier fit on the rectangular pegs on the back of the solebars. A little more thickness where it won’t show but will improve the strength, will also be a good thing.

Atb
Simon
 

simond

Western Thunderer
Having discovered on the way to Screwfix that the Guzzi was running like a stuck pig, there was a brief interlude whilst that was sorted (faulty spark plug cap) before N6 assembly restarted. The Guzzi was a priority as I’m going to Lydden Hill classic bike meeting tomorrow.

I was able to use a 1.5 drill to gently deepen the spring seats and we now have a pretty good match to the buffer height gauge - with 65g (four pieces of lead flashing 38 x 30 mm about 1.3 thick) sitting inside.

image.jpg
EDIT - better photo.

The lead slabs will eventually be stuck underneath like the first of this batch.

image.jpg

I think that’s it for tonight!
 
Last edited:

simond

Western Thunderer
Prototype 2A is now in a similar state. Waiting for the Uhu to dry to secure the lead to the floor.

I have done the mods to the axle guard assy, and amended the supports for the brake racks so they’ll hopefully print ok. I got the print on tonight, we’ll see where we are tomorrow

image.jpg

Atb
Simon
 

simond

Western Thunderer
So wagon 2B (there has to be a joke there) is on its wheels. The axleguards were definitely easier to fit, and as above, we have brake guards and levers.

image.jpg

Left to right.
2B, no brake lever or guard yet, nor spring stops, weights still inside whilst the floor glue sets.
2A, previous axleguards, brake lever & guard fitted.
1, ditto. All these were printed in ABS. This one has been given a quick coat of paint, as it was tacky when it came out of the wash tank & UV.
unnumbered, this one has Ambis sprung axleguards, was printed in FNG.

And, having 3DP spring stops meant that the Minerva Iron Minks could be appropriately adorned too.
image.jpg

I think the N6 is pretty much done, now to start on the N4…
 

RichardG

Western Thunderer
Paul, yes, I used Fourtrack horns/axleboxes on most of my builds, I didn’t realise that Chris/Invertrain has them, but I wasn’t aware of the etched adaptor fitting. Simple & effective, as are Adrian’s home made versions, and the multi-hole fulcra (fulcrums?) are a neat idea.

I pondered various solutions for attaching the “hole for the wire” to the axlebox and went with soldered on lugs. That’s my job for this evening, along, hopefully, with making eight bits of brass angle with two holes in. I might get on with it in a few minutes :)

Simon please excuse me back-tracking over 40 pages, but do you remember whether you attached the 1mm brass axlebox extensions with ordinary 180 degree solder or something stronger?

I have a 1mm milling cutter on order.
 

simond

Western Thunderer
Comparison;

image.jpg
On the left, an opportunistic print of an N4 loco coal wagon, using the office Bambu. It would be ok at a distance, but I don’t think that it is sufficiently smooth/detailed to be anything other than a garden layout model. Quick, simple and dimensionally ok, but surface finish…

On the right is the first attempt at the same artwork using the Saturn. The supports partially failed so the underframe is not very good, but I’ll reprint it this evening, it’s about a 6 hour print. Wash in the morning, dry whilst I’m at work, cure tomorrow evening, all being well.
 

simond

Western Thunderer
The N4s are 12’ WB 20’ over headstocks and the first two prints separated from the raft whilst printing and the solebars bowed upwards a little even though the sheet steel body was pretty much perfect.

I printed another last night, with more support “milk bottles” and the solebars stayed connected and the sheet steel looks ok too, result!

But there’s a very gentle camber from end to end, it’s “bellied” by a bit less than half a mm.

Any suggestions?

image.jpg

Thx
Simon
 

Overseer

Western Thunderer
Thank you Fraser :)


(I could do with a guillotine, it’s been on the list for a while, seriously considered one last Guildex)
I had added a smiley emoji but the phone decided it wasn't required and removed it.

A guillotine is very useful if you need to make squares, rectangles, triangles etc. Saves lots of time and effort. A 300mm wide one means you can cut up brass shim as it comes off the roll, I buy it by the metre.

Someone else will have to help with the 3d print distortion.
 

simond

Western Thunderer
Home after a pleasant bimble around southern Iberia - Sevilla, Cadiz, Jerez, back to Sevilla, and thence to Faro. Very hot, unlike sunny Sandgate where it’s blowing a hoolie and cold grey and miserable :(

Travelled by train where possible then got the Flixbus from Sevilla to Faro. The bus was far less unpleasant than expected, and the trains were very comfortable - except the last leg, which was packed with hung-over Sevillians going home from the Jerez fiesta. I suspect that some had not bothered with a hotel…

Anyway, back on the workbench, and print #2 of the N4 loco coal wagons. I hadn’t photographed the assemble of the axle boxes on the N6 so here we are:

image.jpg

You can see the slot for the Slaters bearing

image.jpg

The springs are very small, they need a little help to guide them through a 1.6mm hole, but they sit nicely when installed - there is a pocket in the top of the axle box just under the leaf spring buckle

image.jpg

Then comes the bit you need three hands for…

image.jpg

I compress the spring with the tip of the scalpel blade and then drop the bearing in

Sorry, poor photo, but after a wee bit of fiddling about

image.jpg

The rectangular holes fit suitable lugs on the inside of the solebars

image.jpg

And if I’ve done my sums right…
 

Attachments

  • image.jpg
    image.jpg
    154 KB · Views: 5
Last edited:

simond

Western Thunderer
Well, I did get my sums right and it all fits together and runs sweetly, which is pleasing.

I had included the spring stops in the axleguard assembly, but they’ve all broken off. I’ll have a think about that, as it would have been convenient. I can print them as separate parts, but I’d like to have some kind of locator to position them accurately.

image.jpg

image.jpg

There’s still a lot to do - brake gear is very obvious by its absence, but there is currently no interior detail in the body, apart from the frames. Another several hundred rivets to be added, I’ll fit buffers & couplings and add some weight, so I can assess whether its springing is set up correctly. The pockets I referred to in the previous post can be adjusted in the CAD to optimise the spring preload, but can’t be easily fixed after assembly, so I’ll have a play with that aspect too.

atb
Simon
 

Rob Pulham

Western Thunderer
Thank you Fraser :)


(I could do with a guillotine, it’s been on the list for a while, seriously considered one last Guildex)
I have a Warco Mini Formit it's only 8" wide and along with the soldering iron it's one of the most used tools in my workshop. It has rollers and a bending function but I really only use the guillotine. The reason I went for the 8" as opposed to the wider 12" is the weight in my old workshop I had to lift it onto the bench when I needed to use it and at 17 kilos as opposed to 45 kilos for the 12" version made the decision for me.
 
Top