7mm Rob's Rolling Stock Workbench

Rob Pulham

Western Thunderer
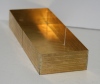
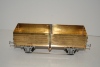
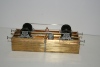
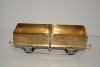
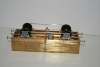
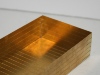
Trying to raise a few funds by clearing a few surplus items. This is one of the welcome Wagons range and it's a BR Pipe Wagon.
This is where I have got to in the last couple of nights
BRPipeWagon007_zps87d5201c.jpg
BRPipeWagon005_zps9863f2d9.jpg
BRPipeWagon004_zps96ec6580.jpg
BRPipeWagon003_zps8350102c.jpg
 

Rob Pulham

Western Thunderer
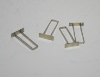
Almost all the add on parts for this kit are cast white metal, despite planning to sell it I have scratch built the most vulnerable parts - so far these have been: guard irons, coupling hooks (Connoisseur beefed up with scrap etch).
BRPipeWagon005.jpghttp://www.railway-models-and-art.co.uk/blog/?attachment_id=288http://www.railway-models-and-art.co.uk/blog/?attachment_id=287BRPipeWagon003.jpg
BRPipeWagon004.jpghttp://www.railway-models-and-art.co.uk/blog/?attachment_id=286I also managed to melt one of the plates that cover where the coupling hook goes through the buffer beams so I made a couple of those too. The next bit of scratch building was the brake cross beam. The cast one was too short so I cut off the cast arm that goes to the vacuum cylinder and made a new rod from copper tube and brass rod.
BRPipeWagon002.jpg
http://www.railway-models-and-art.co.uk/blog/?attachment_id=285The next issue on mine was the tie bars between the axle boxes they are etched and have dimples for the rivets/bolts. I pressed them out before testing against the wagon and the bolt heads were out of line so I remade them from some scrap nickel strip.
BRPipeWagon001.jpg

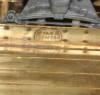
I also added a spare MMP etched plate - not quite right for the wagon in terms of it's detail but infinitely better than the cast blob provided in the kit
BRPipeWagon007.jpg
http://www.railway-models-and-art.co.uk/blog/?attachment_id=295
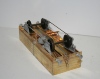
The next problem encountered was that the cast brakes are not long enough to fit close enough to the wheels - the next job is working out the best way to make them fit.....
 

Simon Harrison

New Member
Almost all the add on parts for this kit are cast white metal, despite planning to sell it I have scratch built the most vulnerable parts - so far these have been: guard irons, coupling hooks (Connoisseur beefed up with scrap etch).
BRPipeWagon005.jpgBRPipeWagon003.jpg
BRPipeWagon004.jpgI also managed to melt one of the plates that cover where the coupling hook goes through the buffer beams so I made a couple of those too. The next bit of scratch building was the brake cross beam. The cast one was too short so I cut off the cast arm that goes to the vacuum cylinder and made a new rod from copper tube and brass rod.
BRPipeWagon002.jpg
The next issue on mine was the tie bars between the axle boxes they are etched and have dimples for the rivets/bolts. I pressed them out before testing against the wagon and the bolt heads were out of line so I remade them from some scrap nickel strip.
BRPipeWagon001.jpg

I also added a spare MMP etched plate - not quite right for the wagon in terms of it's detail but infinitely better than the cast blob provided in the kit
BRPipeWagon007.jpg

The next problem encountered was that the cast brakes are not long enough to fit close enough to the wheels - the next job is working out the best way to make them fit.....
Dear Rob,
A simple question from one who is just starting to build from brass etch. I have build several of Jim McGeown's wagons and his Nelly and thought I would try something else. I have broken out in a sweat with this Welcome Wagons pipe wagon, and that is just trying to get the parts off the brass background. I have eventually done it with a rail saw, snips, a Stanley blade and a small file, but not without bending several parts (now straightened).
Is there a simple way of doing this with this heavier gauge brass?
Kind regards
 

adrian

Flying Squad
I have eventually done it with a rail saw, snips, a Stanley blade and a small file, but not without bending several parts (now straightened).
Is there a simple way of doing this with this heavier gauge brass?
I always use a piercing saw, it allows you to cut out pieces with very little trimming and no bends.
 

Simon Harrison

New Member
Thank you. I did wonder, but thought the cost of broken blades would be more than the cost of the kit. I actually bought two kits so will try on the next one.
 

Rob Pulham

Western Thunderer
I have broken out in a sweat with this Welcome Wagons pipe wagon, and that is just trying to get the parts off the brass background. I have eventually done it with a rail saw, snips, a Stanley blade and a small file, but not without bending several parts (now straightened).
Is there a simple way of doing this with this heavier gauge brass?
Kind regards

Welcome Simon, I see that Adrian has offered one route.

I use a sharp wood chisel that I keep just for cutting etched parts from frets.

I look forward to seeing the fruits of your efforts. My build of Nelly is one of my favourites.
 

3 LINK

Western Thunderer
Welcome Simon,

I must agree with Adrian regarding the piercing saw and when I am cutting brass etch I have the etch at a slight forward angle so the saw does not snag so much on the back stroke ( cutting direction ).

I have also just made one of the above wagons and all I will say is I hope it does not put you off wagon building, I will not go into detail only to say if you want to relax and enjoy a build after this, try a Parkside or Slaters wagon.

If you need any help at all, just let us know as that's what we are here for ;).

ATB,

Martyn.
 

adrian

Flying Squad
Thank you. I did wonder, but thought the cost of broken blades would be more than the cost of the kit. I actually bought two kits so will try on the next one.
A quick photo of my setup. I have a hardwood block in the vice with a V cut in the end. You can hold the etch flat and as Martyn says if you have the blade at an angle then there is less chance of snagging. To begin with then yes you will break a few blades - but to be honest probably not that many. I've managed to wear out a couple of blades but not that often - it's usually breakages.

piercing_saw.JPG

For any kits learning to use a piercing saw is an invaluable skill. Practise first on a few spare etchings or cut offs, but if you want to add any extra detailing then being able to cut out your own custom bits is very rewarding.
 

JimG

Western Thunderer
Thank you. I did wonder, but thought the cost of broken blades would be more than the cost of the kit. I actually bought two kits so will try on the next one.

Simon,

Many years ago I picked up a cheap piercing saw which has an adjustable frame, which allows me to re-use the longer bits of broken blade. Obviously you get a shorter stroke than usual, but for cutting out etches it should be OK. I can make a piercing saw blade, and its offshoots, last quite a long time. :)

Jim.
 

3 LINK

Western Thunderer
I have the same type of adjustable framed saw that you have Jim, but it never occurred to me to " re-cycle " the blades, thanks for the tip :thumbs:.

Martyn.
 

mickoo

Western Thunderer
I'm wondering if it might be better to use those thin rat tail type blades that have smaller teeth all the way round, typically used in fret saws I think? Might work better in a piercing saw for taking pieces off etches, I have neither of course...another handy tool added to the shopping list :).

Having said that and looking closely at Adrains image it does look more like a round file type blade than a traditional flat saw blade I've seen advetised for piecing saws?
 

alcazar

Guest
I have the adjustable type too, it was sold to me by GeeDee models specifically TO re-use blades.

And it weren't cheap, to use a Notts expression.
 

adrian

Flying Squad
Having said that and looking closely at Adrains image it does look more like a round file type blade than a traditional flat saw blade I've seen advetised for piecing saws?
It is a flat blade in the photo, just a standard piercing saw blade. They are quite thin so may appear to be round but there is a flat on them. I would have thought that any round rat tail blade is as likely to cut into the part than to cut it out. At least with a flat blade you can cut along the etched tab quite cleanly so there is minimal amount of the tab to file down once it is cut out.
 

mickoo

Western Thunderer
It is a flat blade in the photo, just a standard piercing saw blade. They are quite thin so may appear to be round but there is a flat on them. I would have thought that any round rat tail blade is as likely to cut into the part than to cut it out. At least with a flat blade you can cut along the etched tab quite cleanly so there is minimal amount of the tab to file down once it is cut out.
Adrain, thanks for the clarification.

Your probably right, what little flat is on the blade will help directional control.

Sorry Rob for the 'continued' digression :thumbs:
 

alcazar

Guest
Are you from that way, Alcazar ?.

Steve :cool:
Nope, sunny Scunny, but I used to know Nottingham very well, having spent two years at Clifton TTC.
We used to go over to Nottingham every couple of months as the wife liked the shopping. Not been for some time now.......
 

40126

Western Thunderer
Nope, sunny Scunny, but I used to know Nottingham very well, having spent two years at Clifton TTC.
We used to go over to Nottingham every couple of months as the wife liked the shopping. Not been for some time now.......

Me & Lancer are up Mansfield / Kirkby in Ashfield. Only really go notts to watch The Rams beat them !! :)):)):))

Steve :cool:
 
Top