1/32 Launceston Road

Simon

Flying Squad
Embryo G1 Garden line

Phill Dyson said:
Hi Simon :wave: , what did you do with the middle axle on your milk tank ? , I'm not sure whether I will spring the centre axle on my 7mm ones or have it floating . Did you add much weight to it too ?, with the open chassis I suppose all you can do is add weight to the tank :scratch: .......with other wagons I usually add weight under the floor to keep the centre of gravity low :)

Phill :thumbs:

As regards springing, in G1 the Slaters kit is designed to be sprung on all wheels, (which is my favoured approach in my scale anyway) but I cut down their springs (and epoxied them on to the top of the axleboxes for security) if you don't reduce their springs you get a horrible bouncing effect and a dodgy ride height. I also made sure the axleboxes were easily able to move up and down the hornguides and this involced fiddling with bits of plastikard to improve the rather poor fit of the Slaters components at this point.

The problem with the middle wheelset was sideplay, or the lack of. I initially cut off the axle ends to let the wheels slop a bit, but this wasn't enough. What I did last week was to take the wheels out, remove the axleboxes and then carefully file down the face of the brass bearings on both sides to allow the wheelset a bit more lateral movement, this seems to have worked although I haven't tried to run it through on "Pomparles Siding" yet - which is a very sharp curve and a pretty tough test.

Weightwise, I haven't added any, other than my odd use of copper wire instead of plastic and the wagon is probably a little light as a result when compared to my other wagons. I generally try to keep things fairly light but once I start running trains properly then may find that things need extra weight, in which case (for the milktank) I will be carefully gluing suitably shaped lead flashing up under the sections of floor that sit on the chassis.

Going back to the springing, I aim for a situation where there is some movement upwards "against" the spring and the axle can easily drop down away from the spring but not under pressure from the spring, if that makes any sense :scratch:

Another thought, in order to make the outer wheels removeable you also have to make part of the brake rigging "unclippable" so that the wheels can be released - but this is a relatively simple job (well it was in 1/32 :lol: )
 

Simon

Flying Squad
Embryo G1 Garden line

Tiny bit more progress in the earthworks department.

[attachment=0:l5n2n59b]bitmore.jpg[/attachment:l5n2n59b]
 

Attachments

  • bitmore.jpg
    bitmore.jpg
    472 KB · Views: 73

lancer1027

Western Thunderer
Embryo G1 Garden line

Hi Simon, your making great progress there mate :thumbs: very nice, i look forward to the next pics :drool:

Rob :wave:
 

Phill Dyson

Western Thunderer
Embryo G1 Garden line

Nice to see a bit more progress :D 
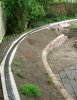
.....your line looks a lot less soggy than mine does at the moment :laugh:

Phill :wave:
 

Simon

Flying Squad
Embryo G1 Garden line

I've done a bit more digging out ready for more bricklaying but am mostly engaged in digging out creeping Jenny, otherwise known as field bindweed.

'Tis blooming persistent, don't get this problem on "Pomparles Siding" :headbang:

Otherwise there has been a general lack of progress owing to sorting out other bits of the garden, but these jobs are now completed so back to the trains :D

And the bindweed.....
 

lancer1027

Western Thunderer
Embryo G1 Garden line

I dont know anyone called Jenny and why is she creeping :lol: :rolleyes: . Ok i'll get me coat :oops:
 

Simon

Flying Squad
Embryo G1 Garden line

CME & Bottlewasher said:
[quote=""Simon"":4w6vhtiw]Tiny bit more progress in the earthworks department.

[attachment=2:1see8yty]bitmore.jpg[/attachment:1see8yty]

Hi :wave:

That's fantastic it will look even better when the greenery takes a hold :thumbs:

Regards,

CME :wave:[/quote:4w6vhtiw]

Thanks very much! Greenery doing OK, although I moved the camomile down to the bottom of the embankment and it hasn't recovered/taken yet :(

Anyway, had a visitor today so got a couple of trains out :cool:

[attachment=1:1see8yty]Trains.jpg[/attachment:1see8yty]

I also (at last) had a bash at ballasting, put on dry, wetted with garden spray and then SBR dropped on from pipettish thing. It's worked fine although I feel I have got it a bit too high between the sleepers. It also looks a bit gloss but I'm sure being outside will cure that in fairly short order. The stones look a bit too "globular" but I think this is probably a function of the crystal size of ganite and may be why other stones/materials are often used instead, but this is a really "picky" point. All in all doing it wasn't too tedious and will certainly make the task of keeping the track clean and clear of debris easier.

[attachment=0:1see8yty]Firstbal.jpg[/attachment:1see8yty]

It is certainly nice to lose the depth of the sleepers and I think it highlights what a good job Cliff has done with his track and rail :bowdown:

I will try and do some more tomorrow....
 

Attachments

  • Trains.jpg
    Trains.jpg
    320.8 KB · Views: 84
  • Firstbal.jpg
    Firstbal.jpg
    424.8 KB · Views: 85

Simon

Flying Squad
Embryo G1 Garden line

After a week of distractions, I managed a bit more ballasting today, completing the whole of the lift out bridge span. I have kept the ballast a bit lower in relation to the sleeper tops and the result is better looking for it.

[attachment=0:3o553m74]Joint1.jpg[/attachment:3o553m74]

This shot isn't the best view, but it shows something that I have just noticed which is close to unbelievable. Running the lowfit across the joint this evening, it was derailing when running off the bridge, ie away from the camera in the picture above. Having investigated, (and you can make out the problem in the picture) the end of the concrete section has lifted slightly at this end with the result that the rail ends at the joint are too high. I can see the crack in the concrete pier upon which the lintel pair sits, but the most unbelievable bit is that it "springs" up and down, and when I apply pressure the rails drop to the correct height.

Goodness knows why this has happened, the lintel pairs were laid onto a wet concrete mix and the next pair were laid after the first pair were dry and so on. I guess the first pier must have dropped, hard to fathom bearing in mind how much concrete was involved :headbang:

The solution will be (I think) to epoxy studding into fairly deeply drilled holes into each side of the lintel pair and then to fabricate and get welded on to the bridge steelwork some steel flat with slotted holes going over the studding's ends so that I can push the lintel down to the desired height and then tighten up nuts to secure the lintel pair to the steelwork at the desired height. This will all be buried in the earth bank in due course, when I have made the abutment.

Or something like that :scratch:
.
 

Attachments

  • Joint1.jpg
    Joint1.jpg
    199.2 KB · Views: 67

Simon

Flying Squad
Embryo G1 Garden line

Thanks for that CME, and how true.

As if to confirm, this morning and for the whole of today, through intense heat and sunlight, the weird "bouncing lintels" thing didn't happen :?

Instead, one side is ever so slightly high while the side is ever so slightly low, some form of adjustment and securing of lintels ends is still required I think. I have come up with a simpler idea than last night's complication.

In the meantime I have been ballasting. This is going pretty well, main problem being excessive consumption of material owing mainly to cant of track.

[attachment=0:176w3qjw]Newball.jpg[/attachment:176w3qjw]

The other trick will be keeping the ballast at the same level between each sleeper, still practice makes perfect, or so they say :laugh:

On the whole though I am quite pleased with it and the sound is better too with the ballast in place. I have done another two 45 foot panels since this shot was taken.

PS you can see the crack between lintel pair and concrete block pier in the picture.
 

Attachments

  • Newball.jpg
    Newball.jpg
    221.6 KB · Views: 44

marsa69

Western Thunderer
Embryo G1 Garden line

Once you've secured the lintel are you going to seal that crack with some kind of outdoor waterproof silica set?
 

Simon

Flying Squad
Embryo G1 Garden line

marsa69 said:
Once you've secured the lintel are you going to seal that crack with some kind of outdoor waterproof silica set?

I hadn't particularly thought of doing that, but now that you mention it I suspect it will be a god idea, mostly because if damp gets in in significant quantities and then freezes in the winter, it may well "blow" my levels all over again.

I don't suppose there's much water in there at the moment :lol:
 

28ten

Guv'nor
Embryo G1 Garden line

If our garden path is anything to go by, freezing water will play havoc when it gets into a small gap like that, so some method of preventing the ingress would probably be a good idea.
 

lancer1027

Western Thunderer
Embryo G1 Garden line

It's looking great with the ballast down :thumbs: Just remind me again :rolleyes: what did you use to fix the ballast ?

Rob
 

Simon

Flying Squad
Embryo G1 Garden line

lancer1027 said:
It's looking great with the ballast down :thumbs: Just remind me again :rolleyes: what did you use to fix the ballast ?

Rob

Thanks very much :thumbs:

I'n laying it in dry, shaping with brushes and a straight edge to give edge definition to the shoulder, spraying with water with a drop of washing up liquid until thoroughly damp with a garden sprayer and then dropping SBR on (neat) from a eyedropper type plastic tube thing.

Make sure whole is flooded, it goes on white just like diluted PVA/Unibond and then let dry.

I have completed another two 45 foot panels this afternoon :)
 

Simon

Flying Squad
Embryo G1 Garden line

28ten said:
[quote=""Simon"":3nbaw2to]

I have completed another two 45 foot panels this afternoon :)
Scale or actual? :laugh: :laugh:[/quote:3nbaw2to]

Tres drole

OK two 17 inch panels :lol: :lol:
 

Simon

Flying Squad
Embryo G1 Garden line

Ballasting now completed up to tie bar of turnout.

Here is the permanent way inspector walking the length this morning :)

[attachment=0:9cw9dbp1]Ballasted.jpg[/attachment:9cw9dbp1]
 

Attachments

  • Ballasted.jpg
    Ballasted.jpg
    399.9 KB · Views: 77

Phill Dyson

Western Thunderer
Embryo G1 Garden line

The ballast looks really good :thumbs:........... We have two of those permanent way inspectors ;)
Phill :wave:
 

lancer1027

Western Thunderer
Embryo G1 Garden line

We have two of the permanent way inspectors but they are in a larger scale and say woof :lol:

Rob :wave:
 
Top