BrushType4
Western Thunderer
Not quite right as a few tweaks needed but a useful building if you’re modelling the GCR in 4mm.


Last edited:


Yep and that was my concern. I tried lasering a variety of profiles but it just didn’t work. However the sheet is just 0.45mm thick so bends easily enough for a road surface.That looks really good.
The only thing that grates (oh, there aren't any) is the flatness of the surface - might it be feasible to laser onto an extremely thin flexible material that could then cover and follow the contours of a profiled base?

 so thought I’d have a go at make a representation for these little fellows.


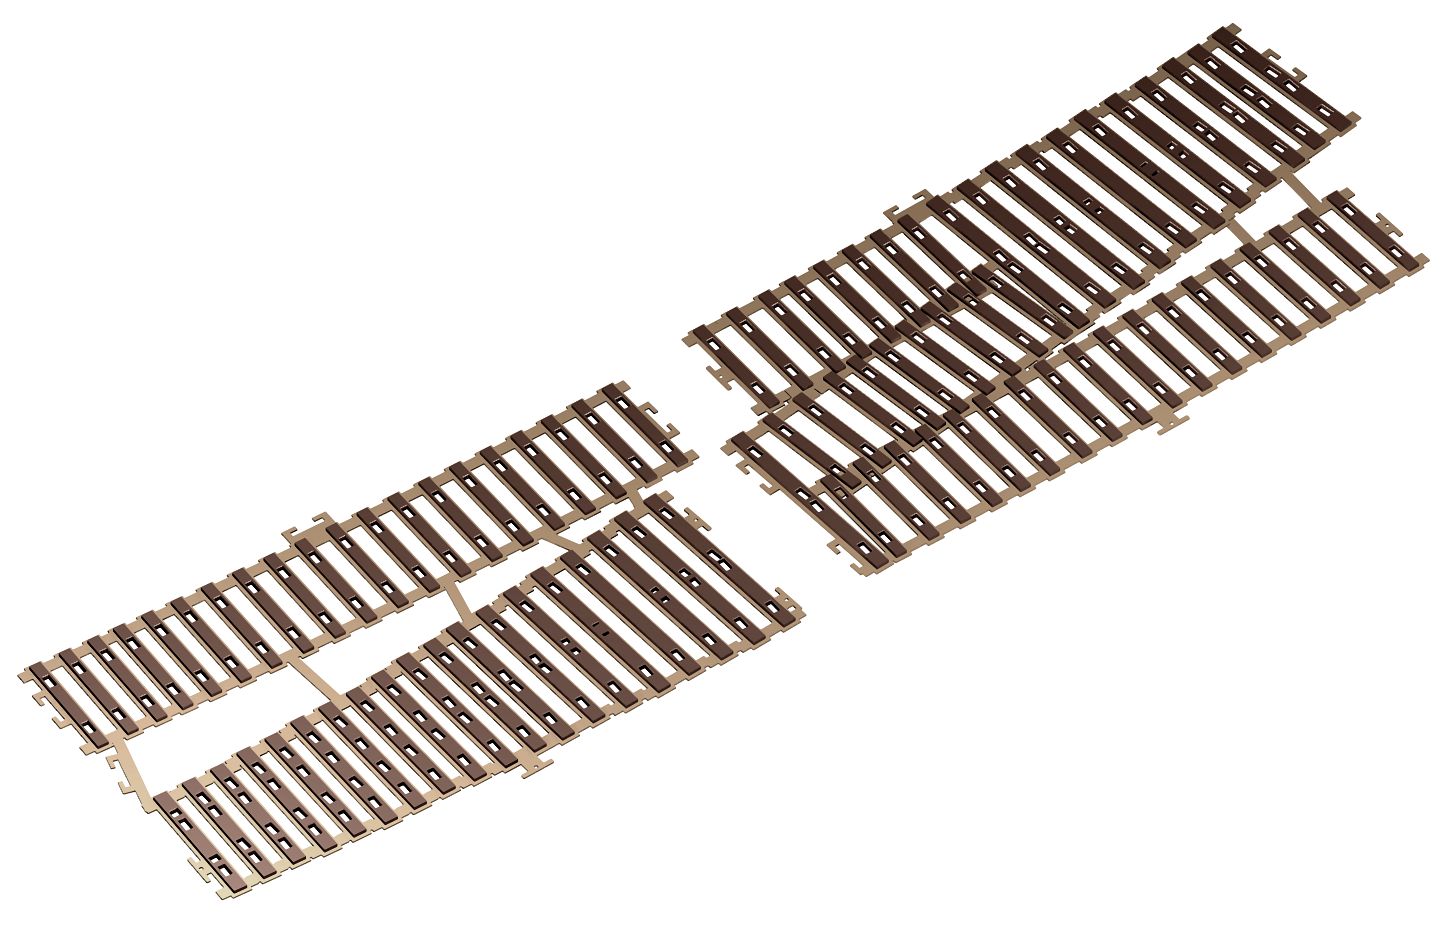
Laser cut point work is a great idea and if you have access to a laser cutter even better. My only concern with your laser cut points is the way the webbing has been done. Being at the same height as the sleepers will make them hard to hide why don't you half etch them on the laser cutter so that they are below the height of the sleepers?Track plans lasercut from Templot plans ready to lay.
View attachment 126209 View attachment 126210 View attachment 126211 View attachment 126212 View attachment 126213 View attachment 126214 View attachment 126215 View attachment 126216
The webbing is quite thin and to be honest it isn't seen once ballasted. I can had etch the web as an option but it would double the price,Laser cut point work is a great idea and if you have access to a laser cutter even better. My only concern with your laser cut points is the way the webbing has been done. Being at the same height as the sleepers will make them hard to hide why don't you half etch them on the laser cutter so that they are below the height of the sleepers?
Yep, here. The repetition isn't really noticeable.The lasered granite setts are a helluva lot better than cobblestones which is what I was planning using until yesterday. I like them because they look old and worn and anything but perfect. 50 years of hard work at Moor Street would result in a lot of stress. Will they be on your website soon? What sort of repetition is there?
Paul
Yep, here. The repetition isn't really noticeable.
Hi Phil,The webbing is quite thin and to be honest it isn't seen once ballasted. I can had etch the web as an option but it would double the price,


Hi Phil,
It will be seen at low angles unless the ballasting is above the timber tops -- daylight between the rail and ballast is a characteristic feature of bullhead track.
My previous dim view of one-piece timbering bases over traditional templates and loose timbers has changed somewhat since I have been developing Plug Track in Templot. This is all EM:
View attachment 151390
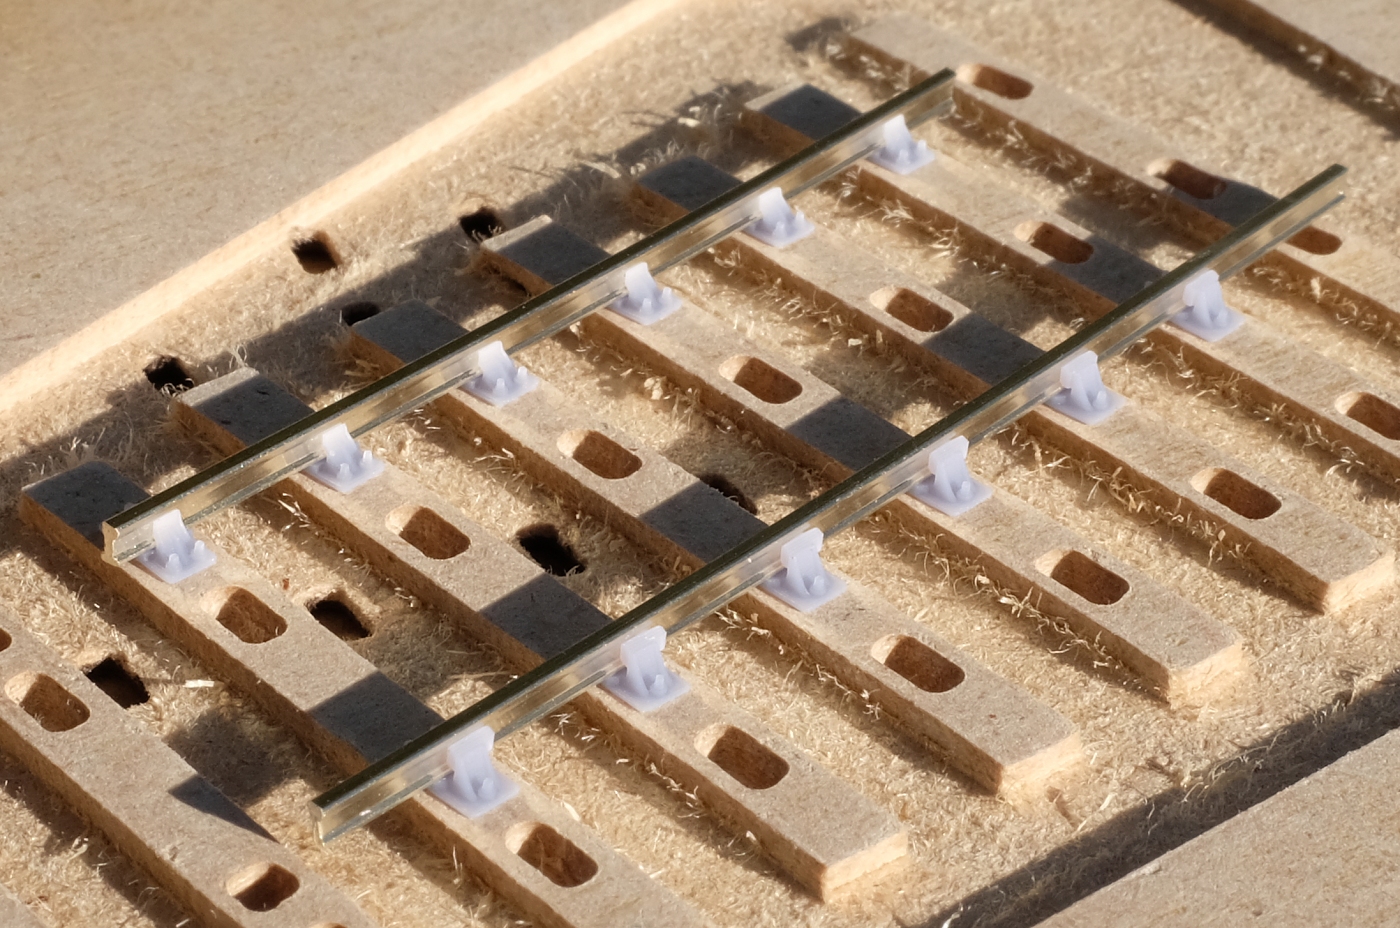
Chairs resin-printed. Firm press fit -- no templates, glue or gauges needed:
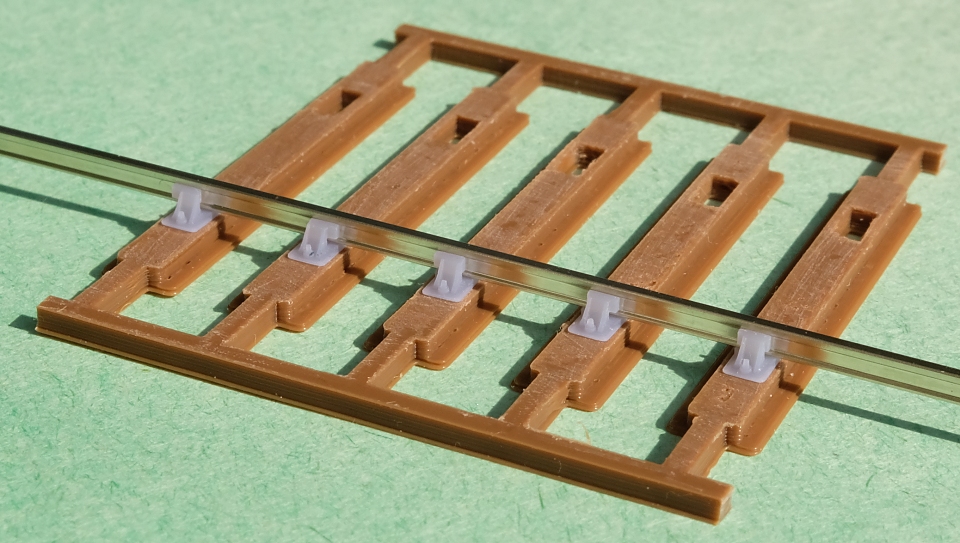
View attachment 151391
Files for above exported direct from Templot, no CAD program or skills needed. For any gauge or scale. All still very experimental and unfinished. More info at:
Plug Track
cheers,
Martin.


I agree with Martin about the webbing being seen unless you pack the ballast above the webbing which would be unrealistic with bullhead track. I suppose the webbing could be trimmed off once the point work was glued down, so why leave it on once the track is down? Half etching the webbing would take more time and make the product more expensive but I suppose you pay for what you get. I have half etched the webbing in EM gauge so in S7 it shouldn’t be too much of a problem.Hi Phil,
It will be seen at low angles unless the ballasting is above the timber tops -- daylight between the rail and ballast is a characteristic feature of bullhead track.
My previous dim view of one-piece timbering bases over traditional templates and loose timbers has changed somewhat since I have been developing Plug Track in Templot. This is all EM:
View attachment 151390
Chairs resin-printed. Firm press fit -- no templates, glue or gauges needed:
View attachment 151391
Files for above exported direct from Templot, no CAD program or skills needed. For any gauge or scale. All still very experimental and unfinished. More info at:
Plug Track
cheers,
Martin.
Very nice chairs, what printer have you used to print them. I have been experimenting on my printer to produce Midland Railway check rail chairs for EM that have a 1mm gape as apposed to .8mm which the commercially available ones are.Hi Phil,
It will be seen at low angles unless the ballasting is above the timber tops -- daylight between the rail and ballast is a characteristic feature of bullhead track.
My previous dim view of one-piece timbering bases over traditional templates and loose timbers has changed somewhat since I have been developing Plug Track in Templot. This is all EM:
View attachment 151390
Chairs resin-printed. Firm press fit -- no templates, glue or gauges needed:
View attachment 151391
Files for above exported direct from Templot, no CAD program or skills needed. For any gauge or scale. All still very experimental and unfinished. More info at:
Plug Track
cheers,
Martin.
I was not familiar with your progress in this area, but I have gone down a similar road, with Exactoscale chairs.
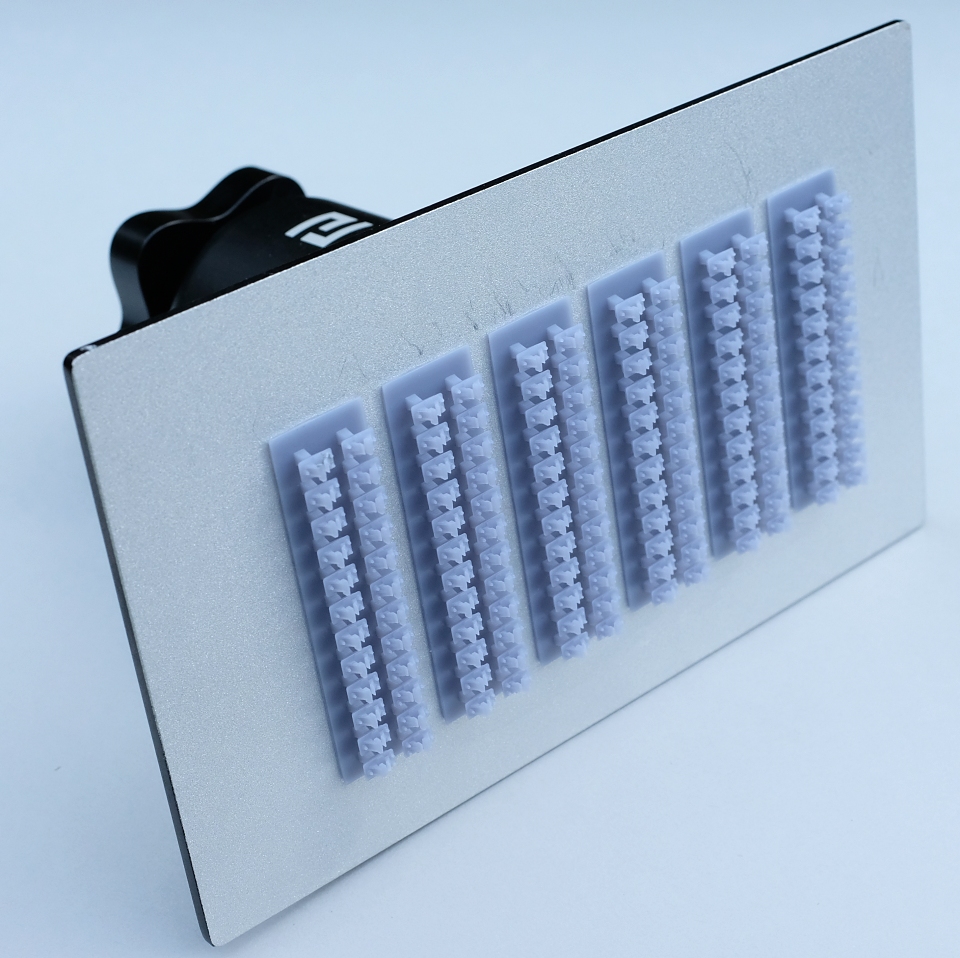
") I called this the Exactopips system in Templot. This for FDM printing:
I called this the Exactopips system in Templot. This for FDM printing:
@paratomVery nice chairs, what printer have you used to print them?
Hi Martin@paratom
Hi,
Thanks. My resin printer is an Elegoo Mars 2P : https://www.amazon.co.uk/gp/product/B08FR2Y1PT
The resin is Elegoo "ABS-like" Resin.
Details of how to get from Templot to finished S1 chairs here:
Experimental Plug Track: 3D-printed, CNC-milled, laser-cut
It's now possible to do the same with L1 bridge chairs. More to follow.
cheers,
Martin.


